Showing posts with label frostings. Show all posts

Sunday, July 11, 2021

Russian Buttercream - Three Ingredients For A Quick Fix

Vanilla Sponge Cake with Russian Buttercream
Garnished with Macerated Strawberries & Strawberry Sauce

Russian Buttercream

One day I was looking through some recipes for Russian desserts. In the past I've made savory Russian dishes, but never dabbled enough in Russian desserts. It was time to remedy that situation. While I was looking, I stumbled across Russian Buttercream. 

What? Russian Buttercream? How did I not know about this? Three ingredients? Are you kidding me? 

Nope. Three Ingredients: Butter, sweetened condensed milk, and vanilla. That's it! 

That's all you need, and the recipe comes in handy when you are in a hurry and need a frosting ASAP! 

As luck would have it, I already had some 4-inch cakes on hand, because I had planned to make Strawberry Shortcakes. Well, that would still happen, but with Russian Buttercream instead of whipped cream. Yeah, I know, I wasn't making "traditional" strawberry shortcakes using a sweet biscuit base, but sometimes we like to switch things up. 

So I go to the food safe to find a can of sweetened condensed milk. We always have that stuff on hand. I rummage. I grab the flashlight so I can look in every corner on every shelf. What? How do we not have any? We always have it! 

Classic case of: "We always have that ingredient on hand when we don't need it, but when we need it we don't have it." It happens sometimes. No rush. Testing delayed for a few days.

The Recipe

Easy as pie! (Actually easier than pie, since making a pie requires more of a time commitment.) Grab 2 sticks of butter from the fridge and set them out until they soften. They should be a little firm, not to the point where they are the consistency of Pond's Cold Cream. (Do they even make that anymore? That might be a bad example.) Not to the consistency of mayo. They should be firm, but not mushy. 

Take out one can of sweetened condensed milk and have your vanilla on hand. 

When the butter is ready, beat it with a mixer on medium speed for 5 minutes. It should look considerably lighter. If you're using a stand mixer, use a spoon and coax the condensed milk into the bowl a little at a time while the mixer is still running. Alternatively, just add in small increments, stopping the mixer between each addition. You can do it 3 to 4 ounces at a time. Add vanilla in at any of those points. 

If your butter seems too soft or the mixture looks like it might be separating, just pop it in the fridge for a few minutes, then take it out and whip it some more. (I had to do that a couple of times because it was pretty warm in the kitchen when I made it.)

So easy. It has a good flavor and is not too sweet, and it has a silky mouth feel. You can pipe it and it will hold its shape, as seen in the photo above. If your hands are hot, work quickly or take breaks and pop the piping bag in the fridge for a few minutes. 

How Does It Hold Up?

If your sweet creation is going to be consumed pretty quickly, using this frosting is not a problem. It will be okay for a few hours if the temperature where it's being held isn't too warm. I frosted a cupcake to test out what would happen to the frosting overnight and the frosting started to lose cohesion and get oily. The cake in the above photo was in the refrigerator overnight and looked just as good the next day. If you go that route, just take the cake out 30 minutes to an hour before serving so it can soften up a bit. If you have stored cakes in the refrigerator before, you know what I mean. 

For Chocolate Russian Buttercream, just add 1/2 to 1 cup of cocoa and whip it with a mixer until well combined. 

Yes, this recipe is a winner. It's a good idea to keep some sweetened condensed milk in your pantry so you can make this recipe instead of relying on one that is commercially made. The flavor is miles above the canned stuff!

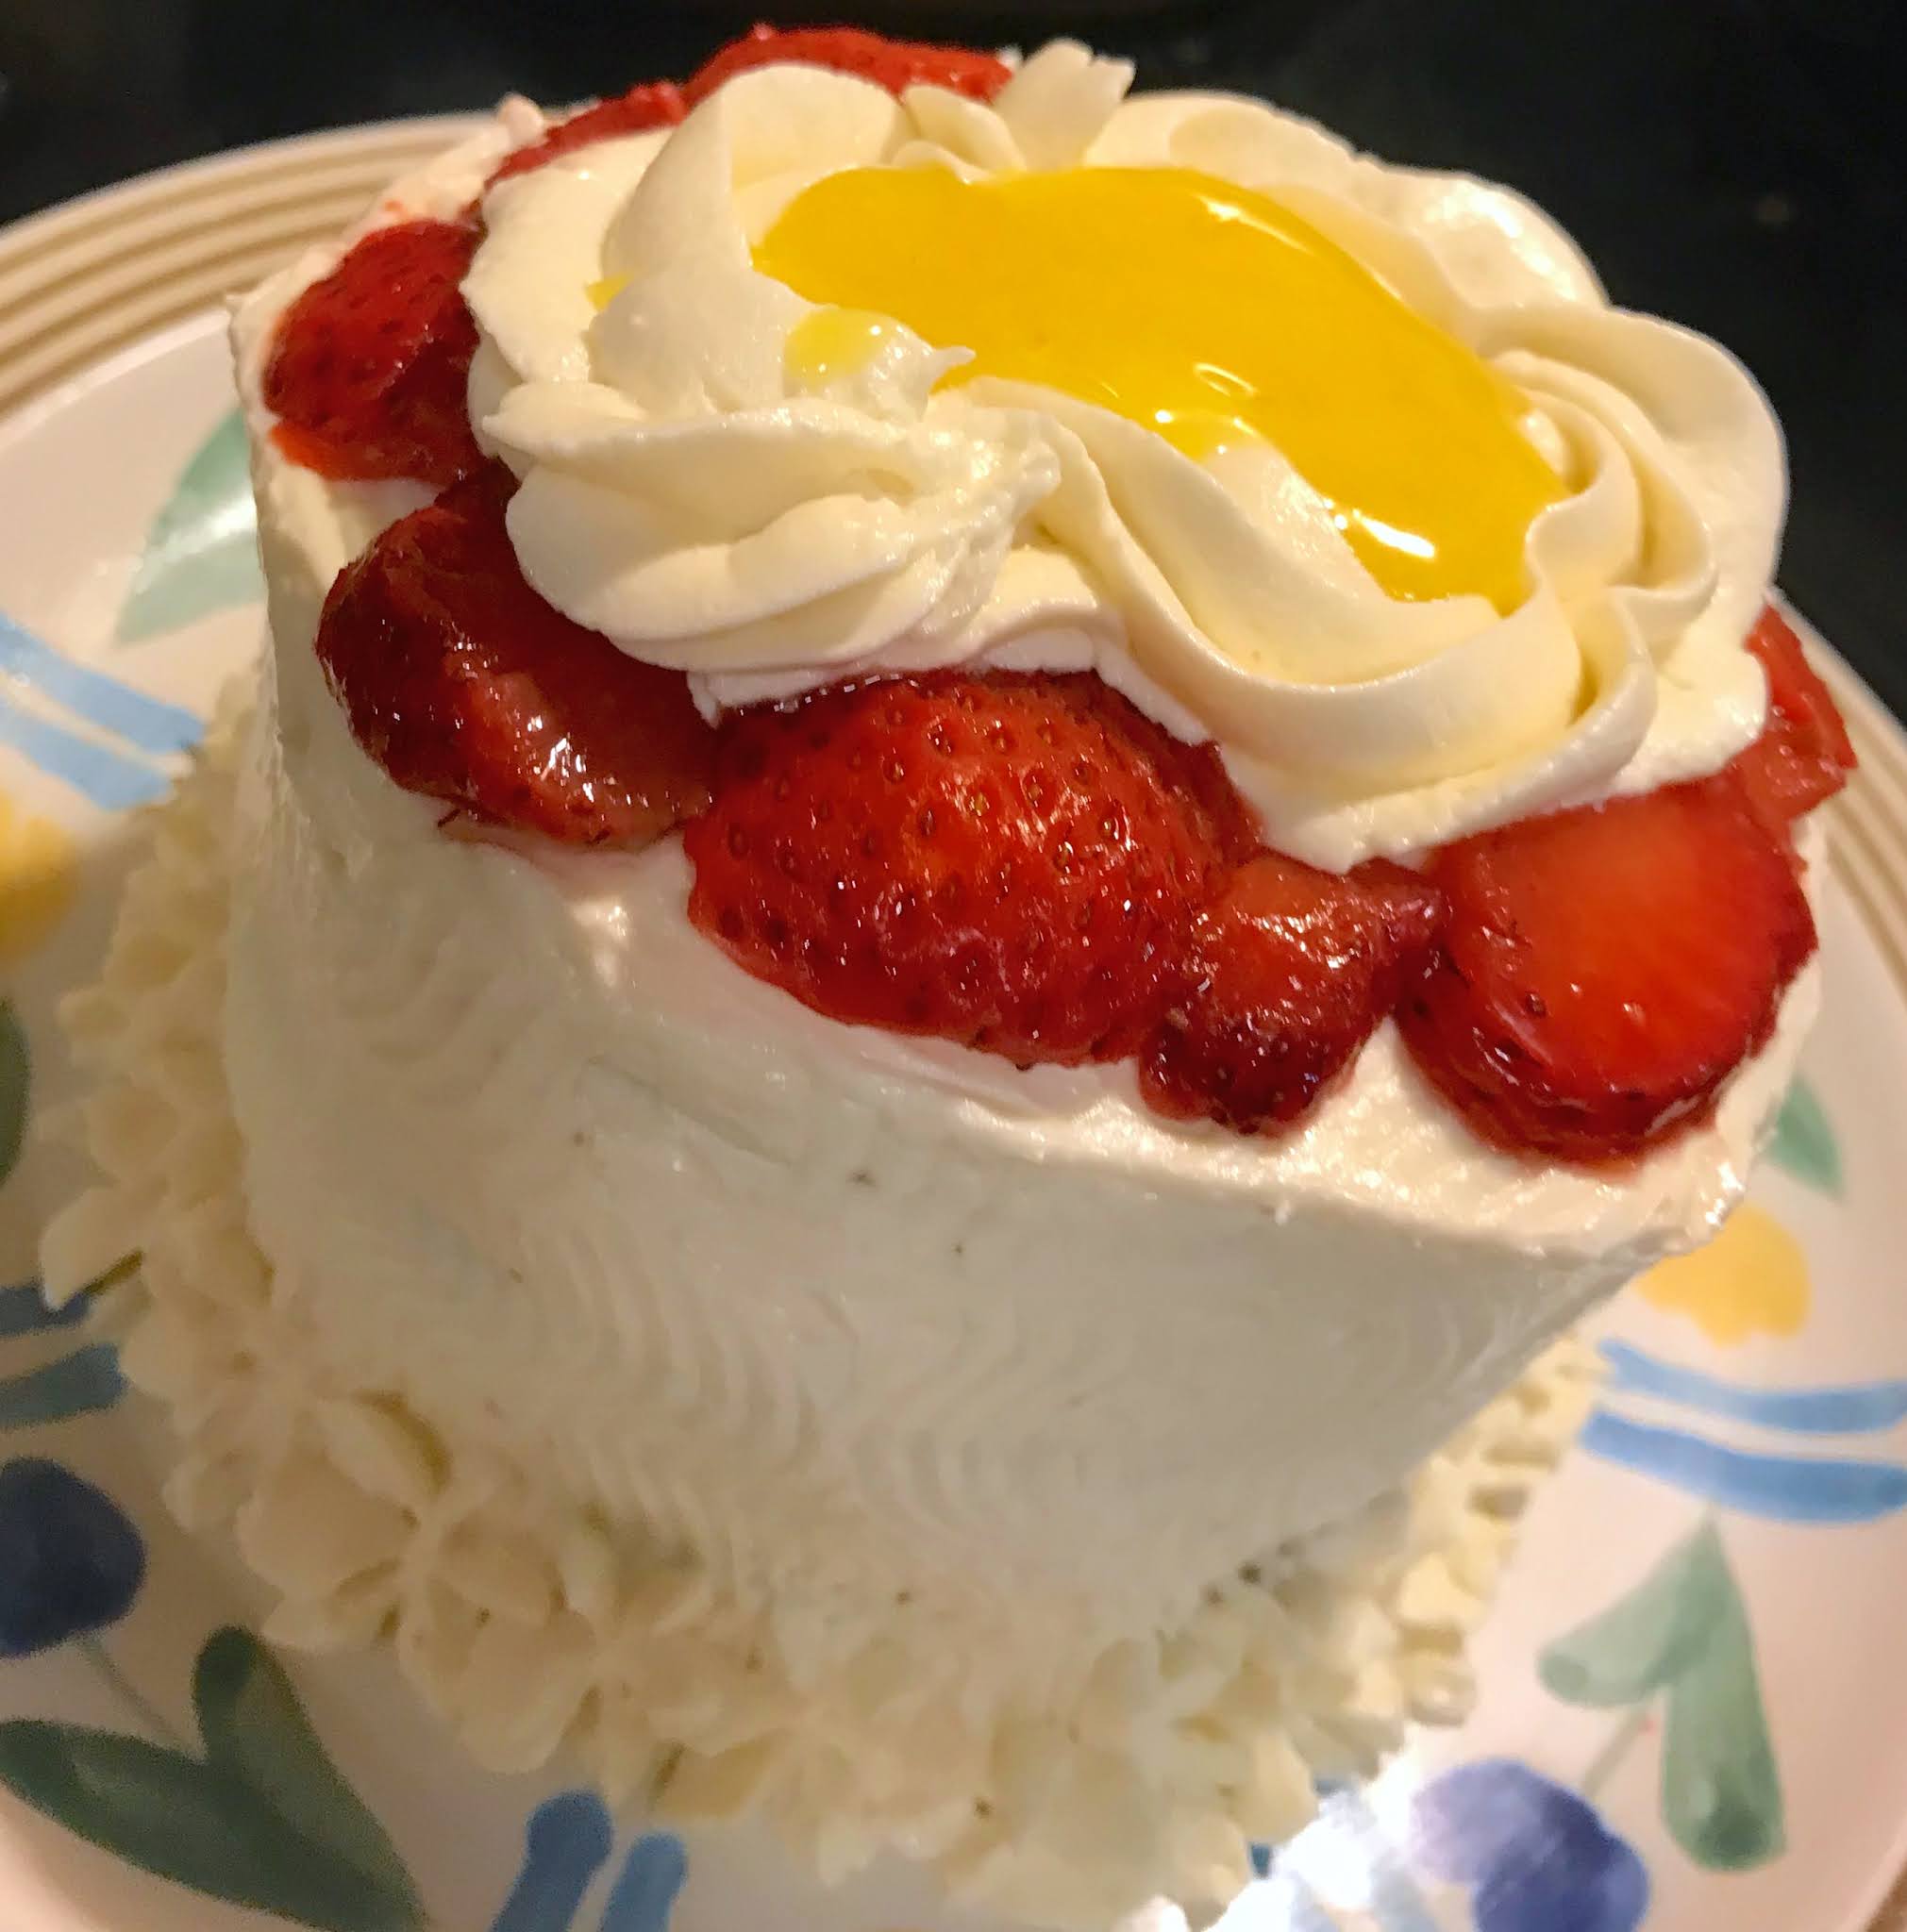
Vanilla Sponge Cake with Russian Buttercream,
Macerated Strawberries, and Lemon Curd

Wednesday, June 2, 2021

Hummingbird Cake - Taste the Fruity Fusion

 Who loves Hummingbird Cake? 

I remember that this particular cake made a lot of appearances in many different places when I was growing up. I remember that it would show up at the county fair when we worked at the "Chuckwagon Cafe," (operated at that time by Jody Mazac). People would bring cakes in and we'd slice them up and put them in the cake safe to sell during the day. So I would have a piece now and again. Cake sampling! Perks of that job were great! Giant vats of "old timey" bbq sauce made by Eddie Lux's parents (the kind almost everyone used to make that's so hard to find now, unless you make it); Sausage (they usually boiled it, but the brisket was totally legit...and delicious!); steam table with side orders; loaves and loves of bread to soak up that great sauce; BBQ sandwiches...it was a great place to be during the fair, even with all of the clean up when the day was done. We worked really long hours, 6am through 8 or 9pm, but it was temporary, so it was easy to recover once the fair was over. 

This cake was also a frequent visitor at potlucks. My grandma used to make it now and then too. I've even made it at least a couple of times. So...great cake! But...sugar overload!! Even back in the day when calories weren't an issue, it was still too sweet. 

So this time, I made a tweaked version, and baked it in a 9x13 pan because it needed to travel out of town. You can totally get away with omitting some sugar in a cake. It is great for crumb structure, but there's no need to go overboard. I also omitted a great deal of the oil that's called for in the recipe. Guess what? It was still wonderfully moist. I'm posting the recipe now before I forget. And please do make note of the frosting recipe. I tweaked that too, and it was totally bomb! 

Hummingbird Cake


Ingredients

3 cups AP flour

3/4 cup granulated sugar (I prefer Zulka, it's minimally processed & no bone char is used)

1/2 cup light brown sugar

1 tsp. Kosher salt

1 tsp. baking soda

1 tsp. cinnamon

1 pinch of nutmeg

3 large eggs (at room temperature), beaten

3/4 cup light olive oil (coconut or vegetable oil will also work)

1 tsp. vanilla extract

1 tsp. rum (optional)

1 8 oz. can of crushed pineapple with juice

2 cups chopped ripe bananas 

1 cup chopped pecans or walnuts, toasted (but toasting is optional)

Method

(You can use a mixer, but it's not necessary. I used a Danish whisk, but a regular whisk would work fine too.)

Set oven to 350° & coat 9x13 pan with cooking spray. 

1. Sift flour into mixing bowl. Add sugars, salt, baking soda, cinnamon, and nutmeg. Mix well. 

2. Add the oil to your beaten eggs & mix until incorporated, then add to flour mixer & mix until just combined. (Don't worry if it seems thick, the pineapple & its juice will take care of that.)

3. Add crushed pineapple & juice; vanilla; and rum. Mix until incorporated. 

4. Fold in bananas & nuts. 

5. Pour into prepared 9x13 pan. 

6. Bake at 350° for 25 to 30 minutes. If you bake a lot, you know your oven, so adjust as necessary. Test middle with toothpick or thin knife after about 25 minutes. If it comes out clean, take out the cake. Also check to see if cake has pulled away from the sides. That's another good "tell." 

7. Let cool completely before frosting. 

8. Garnish  with additional toasted nuts, if desired. 

You can also use this recipe for 3 9" layers or even cupcakes, if you prefer. 25 to 30 minutes for the layers, 15-18 minutes for cupcakes. 


Totally Bomb Frosting Recipe! 💣

Ingredients:

12 oz. white chocolate chips (I actually used Ghirardelli baking chips in this recipe. The bag is 11 oz. and they do not contain any cocoa butter, but they will still work. If you can find chips with actual cocoa butter in them in your area, well...even better.)

4 oz. heavy cream

1 tsp. vanilla

1 tsp. rum

2 Tbsps. unsalted butter, cubed

1 8 oz. package of cream cheese, room temperature (the brick kind, not the whipped version)

Method:

1. Make ganache. (You can use a bain marie if you like. I made this one using a 1200w microwave.)

2. Pour cream into microwave-safe bowl. Heat for 30-45 seconds. 

3. Add chips to bowl & stir a bit, then set aside for a few minutes. After the wait, continue mixing. Microwave another 10 seconds if necessary to make sure chips are melting. If it seems grainy, add more cream in small increments until it is smooth (you might need to hit it once of twice more with the microwave). 

4. Once the chips are completely melted and starting to look glossy, add in the butter a couple of cubes at a time & stir until well incorporated. It's okay to place in microwave for 10 seconds if needed. 

5. Add vanilla & rum & stir until well combined. 

6. Place a piece of plastic wrap on the surface of the ganache & put it in the refrigerator until completely cooled. It's fine if it hardened. I actually did mine the night before I made the frosting, but overnight refrigeration isn't necessary.  

7. Take the ganache out of the fridge & let rest on countertop for 30 minutes to an hour. 

8. Using a spoon, stir the ganache & scrape the sides to make it easier for the mixer. If you have a stand mixer, just scrape it into the stand mixer's bowl. 

9. Whip the ganache until light & fluffy. Add cream cheese in 3 portions, whipping well after each.

10. Try not to eat it all before you get it on the cake. 😆


Just One More Thing...

*Some like to use a 50/50 ratio for ganache when making whipped ganache. That's fine if you're planning to use it to pour ganache on a dessert, or to use for dipping other yummy things like cream puffs, but stick to 1:3 for this ganache. (1 part cream, 3 parts chocolate.) This way you won't have to add anything else in to thicken the ganache, like powdered sugar. This version was smooth, creamy, and divine! I didn't try to use it for piping since I was making a 9x13, so I can't speak to that. I will do a test on that in the future.  


Shout-Out to Zulka! Keep Rockin' It! 


Wednesday, June 5, 2013

Blueberry Hemp Cake-Part I

This experiment is part 1 of "The Blueberry Cake Series." The cake in part one is dense...more like a pound cake in texture. The batter contained blueberry preserves, about a cup of frozen blueberries and hemp seeds. The icing was made with cream cheese, chopped dried blueberries and toasted hemp seeds. It was good, not too sweet (even though the preserves were insanely sweet). It got good reviews from the "taste testers." ;)

The next test will be as soon as possible. Since it's "busy time" in the garden, I'm not sure of an exact date but here are a couple of ideas I've been tossing around:
  1.  A blueberry torte...with a sponge made of dried blueberries and hemp seeds...filled with blueberry mousse. (And maybe a cream cheese mousse...I'm not sure yet.
  2. A blueberry angel food cake
  3. A chiffon cake with blueberries
We shall see. It's always an adventure in Dr. Frazier-stein's kitchen laboratory. Ha! :)

Blueberry Hemp Cake


Blueberry Hemp Cake-An Inside Look