Showing posts with label vegetables. Show all posts

Saturday, November 18, 2023

Excellent Potato Recipe (No Draining) - Make Them For Thanksgiving Or Any Ol' Time!


Nan Taters in Action

I have posted about this potato recipe before, but it bears repeating, because they are so good! I have searched the internet trying to find a similar recipe, I know there must be some out there. The closest recipes I have found using the "evaporation method" are recipes touting "Syracuse Salt Potatoes," and an almost identical version from Colombia. Both of these use approximately 1/2 cup of salt per pound, and involve whole, small potatoes. (And I am definitely going to try those recipes.)

But this recipe is not the same. While you can use whole, small potatoes, bigger potatoes can be used as well. The best potatoes to use are waxier potatoes (like Yukon Gold, or New Potatoes). About a teaspoon of Kosher salt is used, along with 2-3 Tbsps. of oil during cooking. Butter is added after they're done. 

My Czech grandmother, "Nan," made this recipe often, so I dubbed them "Nan Taters." I don't know if she saw it somewhere, or if she just decided to do it to see what would happen. She did do a lot of experimenting in the kitchen, so I think it might have been the latter, unless someone in her family made them in the past. Unfortunately, I can't ask her now, and back then asking didn't occur to me. All I knew was that they were really, really, really good...I could never get enough of them, and I could have easily eaten a whole pot of them by myself (and I could have gotten away with it with no calorie regrets too, at that age. 😄) 

Once in a while she would fry them directly after the evaporation process, but most of the time she would leave them in the "sauce." She made a German version a lot too, since my grandpa was German. She probably made every version imaginable, and then some, because he loved to have meat & potatoes every day. 

For this recipe, the potatoes from her garden were used until the supply ran out. She grew a LOT of potatoes! These were the absolute best ones to use, but using store-bought potatoes works really well too. 

I thought maybe there was a Czech or German tie to this recipe, but I haven't found one yet. If you have made these, or have family members who have, please let me know. I really thought I would find pages and pages of this recipe because it is SO GOOD. But...nope, and I used many different search terms. More people need to try this recipe, IMO, so I am posting it here again. 

Well on the way to creamy goodness!

Tools: A saucepan/frying pan, 10-12 inches (or larger, if you want a really big batch).

Ingredients: 

Yukon Gold or New (Red) Potatoes (amount depends on size of pan)

Water to cover

1 tsp. salt

2-3 Tbsps. oil (I use avocado or extra v olive oil)

2-3 Tbsps. of unsalted butter

Ground black pepper (add at will)

Method: 

1. Wash potatoes thoroughly. If you are using large potatoes, cut into bite-sized pieces. Cut enough so there is only one layer on the bottom of the pan (your mileage may vary depending on pan size). 3 medium potatoes worked well in the 10" stainless steel pan that I used.***

2. Add water to cover, the salt, and the oil.

3. Bring to a rolling boil. Crank it up! Once it gets going it almost sounds like applause.

4. Stir once in a while. Once your water has almost completely reduced, test one of the pieces to see if it is done. If not, add a little more water and cook longer. Repeat if needed until the taters are tender. 

5. The "sauce" is made from the starchy water, so don't let them evaporate all the way unless you are planning on frying right away. If you want the creamy version, let the "sauce" remain and add the butter & pepper. Stir well & add more salt if needed. You can make it as thick or thin as you like. (Just add a little more water if you think your sauce is too thick.)

From here you can serve them as is, or add cream or milk and mash them. The flavor is out of this world good, and all of the nutrients remain instead of going down the drain.

I confess that I made some last night and there were no leftovers. I just called my last portion "dessert." 😆

***NOTE: I did not rinse the potatoes after cutting like I usually do. You can do that if you feel the need. There will be less starch after evaporation, but it will still be enough to make the "sauce."

So here they are again. Give them a try and let me know what you think. If you have any issues, or my instructions aren't clear enough, just let me know and I will fix them. The finished product should be so good that you could eat the entire batch by yourself. If that is not the case, notify me immediately so we can troubleshoot!

And again, if you have info about other versions of this recipe (if you make it or know anyone who has), please share it with me! I love food history & I would like to know why I have never seen it on a restaurant menu anywhere.  It could easily be held on a steam table until service, like some other potato recipes. 

Thank you! 😊

Creamy Goodness Right Here!!!

Saturday, October 28, 2023

Recipe: Green Bean Casserole - The Stovetop Method; A Holiday Shortcut

I started thinking about a stovetop version of green bean casserole a few months ago. I decided to try it out just for the heck of it to see if it would be as good as the oven method. Finally got a chance when I happened to have 1/2 can of mushroom soup hanging around, along with an open package of crispy onions that needed to be used up. So I decided to go for it, using one can of green beans. 

This method can come in handy, especially around the holidays when and oven gets a workout and some dishes have to take turns. Also great if you don't have an oven, or if you get a craving for this dish but don't want to heat up the kitchen with the oven. If you have a microwave but no oven, you can still use part of the recipe, because obviously the crispy onions MUST be toasted. It's just not the same if they aren't. 

Also, some things just don't work well in the microwave. I have started this dish in the microwave & finished it in the oven before, when time was short, but there wasn't a problem doing it that way. Microwave only? No way! 

Sometimes I see posts that mock this dish, but I would really miss it if I didn't have it at least once during the holiday season, or for cravings at other times of the year. Nostalgia food. Comfort food. All good as long as you don't make it a weekly habit. 😁

It turned out really well on the stovetop, next time I will let it simmer a little longer, but other than that, it was very satisfying with the crispy onion topping. 

First: toast your onions. I used a stainless steel pan and it worked just fine. A bonus with this method is you can leach some of the oil out of the onions if you let them rest on some paper towels while you prepare the rest of the dish, and leach out a few calories too. 😆 Otherwise, just put them in a bowl & set aside. Also, if you like them darker, go for it. These were dark enough for me after toasting.

Before Toasting


After Toasting

Next, wipe out the pan out with a paper towel, (or not). There will be bits left in the pan from the onion toasting. I left those in. Add the soup & milk. Add a little pepper, mix well, drain beans, and add those in. Let this simmer & reduce for a few minutes.


Add part of the crispy onions. I always save as many of the onions as possible for the crispy top layer. Too many in the soup layer can get a little funky anyway. 


I always sprinkle extra pepper on the top. Just ignore this if you don't like a lot of pepper. Simmer for a while, let it reduce a little more, Then sprinkle the rest of the crispy onions on the top & serve.


The Result - Success! Still tasty as ever & saves a parking space in the oven for another dish that is waiting in line. 

Sunday, October 8, 2023

Let's Cook Some Broccoli - A Simple Recipe, A Great Flavor


I still have an issue with the guy who posted a video and tried to convince people that their veggies at home were not as good as they are in a restaurant. It just totally rubbed me the wrong way. He tried to claim that the "secret ingredient" that makes restaurant veggies taste so good is...butter. 

In the first place, I want to know where in the world he is getting all of these wonderful restaurant veggies, because the majority of the time, veggies are an afterthought in a restaurant. They are usually overcooked, undercooked, over-seasoned, or under-seasoned. And by over-seasoned, I mean salty AF. At least with under-seasoned, you can add what you want. 

So, unless you are dining at a 5 star restaurant, (and sometimes not even then), your average side-order veggies are a disappointment. I would say...99% of the time. That has been my experience. Your mileage may vary. 😀

Forget what he said. It is just pure BS. You can make veggies at home that far surpass any restaurant veggies. It's the cooking method, not the 5 pounds of butter, that make veggies good. They don't need a lot of adornment, but you can go that way too, once the cooking method is down pat.

Back to the broccoli. Unless I'm planning a broccoli casserole or broccoli soup with the leftovers, I usually just grab a good-looking crown of broccoli instead of a big bunch. That gets us through a meal with maybe enough left over for lunch the next day. (No guarantee on that though. It might all be consumed the very night it is made.) 

Either way, first rinse your broccoli. If you have a designated spray bottle for vinegar that you keep next to the sink (and if you don't, you should), spray it with that first. Then rinse & set it aside for a few minutes. 

For just a crown, I use either a 2-quart or 4-quart saucepan. Fill it 3/4 of the way up, add about a teaspoon of Kosher salt (less if you use granulated salt), and set it to boil. 

Then process your broccoli. Cut the crown into florets, and try to make them somewhat the same size. Cut them in half if necessary. But don't make a big deal out of it, as long as it's mostly uniform, you'll be fine. Peel and dice the stem too. 

Rinse again for good measure, then add to the saucepan after the water has reached a rolling boil. Stir, bring back to boil, then turn down to simmer. It will take 6-8 minutes before it's ready.

The pic above was taken after the water started to boil again. You can see it floats. Pennywise would approve. 😀

In this next pic, you can see that the broccoli has started to go below the surface. That's when you want to pull it. Sometimes I let it cook for about another minute once it dips below, but most often I pull it. 


Drain (no need to shock it in ice water), & add a little pepper & maybe 1 tsp. of butter, and toss until coated. Delicious!

Or you can leave it as-is, you use your favorite topping, or use it for soup, casserole, etc. Perfectly cooked, al dente. That's how it should be. If it is olive drab "army green," you are cooking it waaaaay too long!

If you aren't getting results like this with your broccoli, just drop me a line so we can figure out why. 


Friday, September 22, 2023

Product Review: Costco's Kirkland Organic Mixed Vegetables


Costco's Kirkland Organic Mixed Vegetables, (Pictured above with country fried steak and mashed potatoes & gravy), are a cut above the other mixed vegetable options on the market. I have no complaints about this product at all. 

It's a well-balanced mix of green beans, green peas, corn, and carrots. It's good as a side dish, but you can also use it in other dishes like soups or homemade pot pies.

I was never a big fan of mixed vegetables in the past. Costco changed my mind, but now I only want to use their veggie mix. I just can't buy any other brand now. 

Costco: Don't change a thing with these, please! 

My favorite way to make these is to cook them longer than recommended on the package, then drain completely and add a tiny bit of butter plus S&P to your taste. Delicious! 

Tuesday, September 5, 2023

Kitchen Tip: Serve the Perfect Avocado


The photo above was taken at the absolute peak of this avocado's flavor. I am convinced that many who loathe avocado have not had the pleasure of consuming an avocado at its peak. If they had, they would adore avocado and seek it out regularly. 

Nutty, buttery, and just at the right texture: not too firm but not too soft. Easy to peel, no avocado stuck to the skin, and no skin adhering to the avocado (as it sometimes does. The inside of the skin will stick & you have to scrape it off to get to the green goodness. Well, you can leave it on, but I wouldn't recommend it.) I'll take a picture the next time it happens and add it to this blog entry. 

No blemishes on this beauty though - none inside or outside. Just avocado perfection. 

I finally learned my lesson about these some years back. When you shop for them, you will either find them completely unripe and hard as a rock, or mush. Sometimes you get lucky and find an "in between," but even then there's no guarantee it will be acceptable. 

So never mind the "in between," unless you have a grocery store you know you can trust. Buy them when they are completely unripe, and allow them to ripen at home. One or two days on the counter, then when they start to get slightly soft (just barely yielding to finger pressure), pop them in the fridge to finish. 

If you are planning to make guacamole or some other dish for a party, you have to plan ahead so they are at their peak, or at least near it. It is worth the extra effort though. Absolutely. 

Here in South Central Texas, they will ripen in 2-3 days; sometimes 3-4, depending on the time of year. Once you do some personal testing, you will find your own "sweet spot." 

I found out about "The Avocado Guy" in New York City a few months ago. He gets it! So much so that he has turned it into a business. Every city should have an avocado guy like this. Lucky, lucky, lucky! 

Here is his story. Video is almost 11 minutes, and worth the watch for sure!

The Avocado Guy

Sunday, July 30, 2023

Microwave Corn on the Cob?


Question: Can I microwave corn on the cob? 

Answer: Yes! Absolutely!

 If this is not on your "microwave list," please add it with confidence. I am totally addicted now, thanks to my Mom.

Just peel back the shucks, remove the cornsilk, rinse, then pull the shucks back up. Microwave for 2 1/2 to 3 minutes.* Done and done! Perfectly cooked, excellent flavor. Add your favorite toppings. 

I didn't consider this to be a good food item to cook in a microwave. I never even gave it a thought. I'm not even sure where Mom found out about it, but I would love to send that person a big "thank you." 

I have not yet tried it without shucks, since we were in season when this craze started in our house. Maybe damp paper towels would suffice. I will update later when I try it with "shuckless" corn. 😄

*Note:: Instructions fit microwaves that are 1200 watts. 


Thursday, July 27, 2023

Defend Your Vegetables!


Vegetable Vexation?

I'm here to defend my vegetables, because one day I watched a video that popped up on Facebook.  The topic was: "Why don't the vegetables you prepare at home taste as good as vegetables from a restaurant?" 

Huh? I was perplexed. I have always encountered the exact opposite. Well, with rare exceptions. The vegetables from restaurants are usually sub par -- overcooked, treated as an afterthought, etc. Unless you are dining at a "high end" restaurant or an independent "farm to table" type of establishment, that's just the way it is - (and sometimes those are questionable as well, because paying more money does not necessarily equal good food).

Anyway, this guy reveals the "big secret." Get ready....it's...BUTTER! Restaurants use more BUTTER! Vegetables are practically swimming in it. That's why it tastes better, according to the dude. 

Well, that's just ridiculous. In the first place, most restaurants don't cook vegetables to order. They either blanch & then "refresh" them per order by sautéing, or giving them a quick dip in boiling water, or they simply hold them "as is" on a steam table (and hopefully they adhere to the time limit and change them out before they turn to mush if they aren't being consumed in a timely manner). There are some restaurants that used canned veggies as well. 

Not that there is anything wrong with cooking ahead of time & "refreshing," or using a steam table. These are lifesavers for busy restaurants, and if they keep up with them, then no problemo. BUT...the veggies prepared this way are in no way superior to veggies you can prepare at home. Quite the opposite. 

So I have to call BS on that dude. I wish I could remember his name but it escapes me. Maybe he just has trouble with vegetables himself, so he assumes that it is a problem for everyone else too. No. No. No. Not at all. And you DO NOT need a pound of butter to make veggies taste good. Some don't need any at all. The simplest preparation yields the best flavor for fresh vegetables. For frozen or canned, a little more "decoration" might be necessary. 😄

As an example, see the veggies below. Fresh spinach, green beans, and Brussel's Sprouts. (There were also fresh potatoes with this meal, just peeking out up there on top.) All of these were from Costco. The green beans, unfortunately, were a mixed bag, as you can see. Different shades of green. Some of the beans were not as fresh as the others. You don't see that when you pick them fresh from your own garden, but this was earlier in the year before Spring, so Costco filled the veggie bill.  

Fresh spinach: Use a large frying pan, medium heat. Add 1-2 tsps. of light oil (avocado or extra virgin olive oil). Spread the oil around so it coats the bottom of the pan. Add 1/3 of the spinach, let it wilt a bit. Repeat 2 more times. Make a small well in the center & add one clove of minced garlic (optional). Stir the garlic a bit & let it cook for 1 or 2 minutes, then mix it into the spinach. Add S&P to your taste.

 This is a short-cut method & it is very tasty. The moisture in the spinach will steam it. No need to add extra water or boil it first before sautéing. This was one of the giant containers from Costco. 16 oz., if I recall correctly. So the recipe fits for that, but it doesn't need much adjusting if you have a smaller amount. Of course, with spinach, you want to have as much as possible since it shrinks so much.  

Fresh green beans: Bring salted water to a boil & add green beans. Cook to your specifications. I like mine al dente. That part is up to the cook. Just fish one out for a test after 8-10 minutes. 

Brussel's Sprouts: Nice big bags of these at Costco, already removed from the stalk. Most of the time rinsing is all you need to do, but sometimes the bottoms need to be trimmed off a little. If they are pretty big, cut them in halves or quarters. Then place in a stainless steel bowl, drizzle with olive or avocado oil, toss in some S&P, then mix until they are coated. Roast in the oven until tender, checking them a couple of times and stirring (actually, I usually flip each one with tongs). They are spectacular with a little caramelization. I could eat the whole bag. 

The thing to remember with these is not to crowd them or you will have steamed Brussel's instead of roasted. I usually roast at 350 for 15-20 minutes. You can go higher if you are in a hurry, just keep an eye on them. 

Taters: For waxy, thin-skinned potatoes (red or yellow), no need to peel. Scrub well & place in a saucepan. Water to cover, add salt. Bring to a boil, then turn down to medium & cook 8-10 minutes. Test with a knife, it's the best way. Then drain, add a couple of pats of butter & some black pepper, and mix. You don't need a pound to get good flavor. Sometimes I add just one pat of butter & then drizzle a little olive oil in before tossing. Yum to the max! 


(One day I will set up a camera and film some of these methods. It's a lot easier than trying to explain it in text.) 

There you have it. Four veggies, all simple prep, no pounds of butter needed. I would send this to that dude, if I could remember who he was. 😄

Defend your veggies! What have been your experiences with restaurant veggies? Share your story in the comments if you have time. We all want to know where the good restaurant veggies are! 😄


Saturday, March 18, 2023

Kitchen Tip: Avocado Storage - Keep Your Guacamole Green

Sometimes in life you end up with leftover guacamole. What?! Say it ain't so! How can that be? 

Even the most avid guacamole lover, who seeks out the very last speck with dogged determination, has this problem from time to time. 

 Question: What is the best way to store mashed avocado or guacamole to prevent browning (oxidation)? 

What I started doing a while back was this: 

Find a container with the smallest diameter that will be big enough for your leftovers with some headspace left after the guacamole has been placed inside. You don't need a lot of headspace: 1 to 1 1/2 inches is enough. 

For the leftover portion of mashed avocado below, (1/4 to 1/2 cup), I used a small, vintage serving bowl. It has about a 3" diameter on the top part but it's "fluted," so the bottom part is slightly smaller. The little ramekins used for single servings of creme brûlée or lava cake are of similar size and would be ideal for a portion this size. 

Put your leftover guacamole or mashed avocado in the bowl and smooth out the top with a spoon so it's nice & flat.  


Add a layer of your favorite salsa to cover the guacamole. It won't take much to cover it. (You can't tell from the pic but the layer of salsa on this batch was about 1/8"-1/4" deep.) Cover the bowl with plastic wrap (or a lid if it has one).


The picture below was taken the next day, 12-18 hours after the protective layer of salsa was added. If you zoom in you can see that the specks on the inside near the top are brown. (I should have left a larger schmear or a small glob o' guac uncovered, but I didn't think about that until I was taking the picture the next day. Of course!)  😁


Remove the layer of salsa to consume separately, or mix it in. Look at this lovely green color. No oxidation. No altered flavor. Oxidation does affect the flavor too, btw. But I am blessed (cursed?) with so-called "super receptors," so I can always tell. (P.S. - let's call it blessed rather than cursed. lol)

Placing a piece of plastic wrap directly on top of the guacamole and maneuvering it around so it's airtight is also an option, but you do lose some during removal, and unless it's super airtight, you will still experience some oxidation. (Also, I'm not a huge fan of using plastic wrap, so if I can find an alternative method, I'm all in!)

You can do the same thing if you only need half an avocado for a recipe. Leave the skin on the other half. Place it on the flattest plate you have, nestled in a small puddle of salsa. You can do it without the salsa, but unless it is completely level, air will get in. Wrapping the plate with plastic wrap is optional because the intact avocado skin will protect the rest of the avocado.

I once read (and I don't remember where) about someone putting water on top of guacamole to keep it from oxidizing. Okay, but then you lose some of that good green gold when you drain it off. It may also make your guac too watery. 

Don't use water. If you're not a fan of salsa, there are other things that can be used: mayo, sour cream, hummus, a thin layer of olive or avocado oil, etc.

This would also be a good option if you make a batch for a potluck or a party. You can make ahead of time and not have to worry about it turning on you before the party gets started. 

This method may have already been posted on the internet 10,000 times. I didn't check, but one more won't hurt. So in case you missed the other 10,000 posts, here it is again. 😄 

The amount I saved is roughly the same amount that Chipotle gives you if you decide to order it as an extra. I don't know what the current price is, but the last time I was there, it was still a pretty penny.  

Monday, February 20, 2023

Kitchen Tip for Cucumbers


The picture above illustrates the preservation technique I use for thin skinned cucumbers, (like the English cucumbers), but this would also work with other varieties. I usually only use this technique for the smaller ones, because the larger ones have a longer shelf life. 

But those minis...if you don't eat them every day, the remainder of your cuke stash will deteriorate much faster.   

So my solution to this dilemma is simply to wrap them in a paper towel dampened with vinegar. It doesn't have to be soaking wet. We always have a spray bottle with vinegar on hand in the kitchen for various uses, and I just spritz it a few times, wrap the cukes, then spritz it again if needed. 

I wrap the cucumber completely, and if there's room, place another on the paper towel and continue wrapping. We normally use the paper towels that have the half sheet option, and I only use the half sheet to do this. The minis aren't usually that long so I place them with the ends of the cukes facing the short sides before rolling. Two will fit comfortably on there, and if they are small in diameter, three will usually fit. Then just put them in a bag and place in the refrigerator. Refresh with vinegar spritz if needed. 

They do start to get a little "pickley" after a few days, (but I'd rather deal with that than have them deteriorate to the point of no return and end up donating them to the compost bin). It's not that noticeable because the inside of the cukes do retain the cucumber flavor. If the tangy taste is bothersome, you can always peel them, or make a nice cucumber salad with oil & vinegar. 

I can't take complete credit for the tip. Years ago I read about preserving block cheese using this technique, (and it does work with the cheese, in case you are wondering), so one day I decided to try it with the cucumbers.

As far as paper towel brands, well...we use Costco's paper towels and have not had any issues with the towels tearing or fragmenting when used in this manner. There are brands out there which won't fare as well,  but it's still doable with those, I'm sure. Just take care when rewrapping after removing one for use. 

After your cuke stash has been depleted you can still use the paper towel(s) for cleaning or spills. 

Wednesday, June 1, 2022

Quick Tater Tip

 Well, it's getting a little rusty in here, so I thought I'd better drop in for a quick visit. 😁

Let's talk potatoes! I don't often use a microwave to cook them (we didn't even have a microwave for years after the last one went out). We finally did break down and get another microwave and I'm glad we finally did, really. They aren't entirely evil. Vegetables cooked in the microwave retain more nutrients than other methods, so there's that! 

But back to the taters! Some of you might already be doing this,  but here it is for those who haven't: Instead of poking the potato before placing it in the microwave, make a cut down the middle of it, but don't cut it all the way through. Leave a bit of it uncut, (like 1/4" to 1/2" or so). Think potato "clamshell." 

Then put it in there and blast as usual. It works great, and if you are planning on making a recipe like, say...."Cheater Twice-Baked Potatoes," it makes things quicker & easier. (Now there's a recipe I'll have to post soon. )

Even for a regular microwave baked potato, it is a good idea. You can still rub it with oil or butter & roll it in salt if that's your preference. It just makes it a little easier to deal with after cooking, because you don't have to worry about steaming the heck out of your fingers when you cut it open. 

Anyway, give it a try & let me know what you think about it. 

Happy Eating! 😊

Monday, August 2, 2021

Recipe: Nan's "Knock Your Socks Off" Potatoes


Get your fork! We're ready to Rock-n-Roll!!!

A Little 'Tater Background

This is a recipe my maternal grandma (Nan) used to make on a regular basis. She was Czech, but I don't know if the recipe was a Czechoslovakian method of cooking or if she just started cooking them that way herself. She had so much energy for so many things -- she worked from sunup to sundown with hardly a break. She wore many hats: mother, grandmother, great-grandmother, gardener, baker, cook, seamstress, volunteer...those are just a few examples. She always made sure none of us went hungry. She always had something available for us, as well as any visitors, whether they were invited or just dropping in for a quick visit unannounced. 

She liked to challenge herself in the kitchen and one her challenges was how quickly she could get a meal prepared. She liked to get lunch prepared in 30 minutes, and she would time herself. Dinner might take a little longer, depending on her mood and whatever she had in the baking queue on any particular day. That could be why this cooking method for potatoes was a favorite. My grandpa was German and he loved his meat and potatoes, so I'm sure that factored in as well. 

I don't have any real measurements for this recipe, I just make them from what I learned by observing her method. The best I can do is try to get a measurement on how many pounds of potatoes are used next time I make them. 

This recipe is best with fresh, red potatoes, but any waxy potato variety will suffice. You can use starchier potatoes (like Russets), but the end result will be different, because waxy varieties of potato hold their shape better. However, I would recommend starchier potatoes for this method if you are planning to make mashed potatoes, because it removes a step and saves time. 

Another great thing about this method is that all of the nutrients in the potatoes are retained instead of going down the drain. But be warned! These potatoes are SO GOOD, that you'll be tempted to forgo all of the other dishes and gorge on these potatoes! They are so good, I almost fall over every time I eat them. The flavor will knock your socks off! 

Recipe

A large frying pan is crucial for this recipe, unless you are only cooking for one person. Actually, go ahead and use a frying pan anyway, because you will absolutely want to have leftovers for the next day. (If you are able to control yourself, that is.) 

  • 1 frying pan: 10", 12", 14" - it depends on how many servings you'll need. We usually use a 10" or 12" and that will make 4 reasonably-sized servings. 
  • Red potatoes (or any waxy variety) as needed
  • 2-3 Tbsps. Cooking oil (light olive oil, canola, or vegetable oil)
  • 1-2 Tbsps. unsalted butter
  • S&P (to taste)
  • water (as needed)

1. No need to peel potatoes. Wash, trim any bad bits, then cut into bite-size pieces. Use as many as needed to cover the bottom of the pan.

2. Place potatoes in a single layer in pan. 

3. Add water just to cover potatoes (see below), then add oil and butter. (or just add oil & add the butter after potatoes are done.)

4. Add S&P. Stir to combine. 

5. Bring to a boil over high heat. 

6. Turn heat down to about medium-high. Stir potatoes once in a while. 

7. Test potatoes, and when they are about "al dente," turn the heat back up to high and cook until the water evaporates (au sec). The potatoes will form a small amount of sauce with the oil & butter. Add more butter if you wish.

8. You can eat these just as they are, or allow them to brown a bit. They are spectacular either way. 


Boil Those Beautiful Babies!


Cook to au sec.

Add a bit more butter if you like & stir until mixed.


Rock-n-Roll!!! 

Monday, July 19, 2021

Kitchen Tip: Microwave "Baked" Potatoes - No Poking Required


"Potatoes in a Bin"
(Public Domain Photo) 

Do you use a microwave oven to "bake" potatoes? We went without one for a few years after the other one went kaput. Last year we finally took the plunge and got one at Costco. 

So a quick "baked" potato has become all the rage again, when hunger strikes and waiting for it to bake in a conventional oven is just not possible. It's not as great as a real baked potato, but hey...it is passable. 

One day I decided to change the preparation a bit. Instead of poking it with a fork in several places all over, I decided to make one cut with a knife.   

Here's how it works: 

1. Cut through the potato (lengthwise), almost to the other side, leaving about 1/4" to 1/2" uncut. Cutting it halfway will work as well. 

2. Place the potato in the microwave, with the cut side to the facing to the side. 

3. Cook as usual as per your microwave wattage.

Poking holes with a fork can sometimes be a pain, and you have to poke it in several places. That could be just me. When I poke it, I really poke the thing, and sometimes it's hard to pull the fork back out because of suction. 

Cutting it saves time and possible burns after cooking because all you have to do is open it up to add your favorite toppings, instead of cutting the hot potato. 

It cooks better too. I don't think I'm imagining that. I've done it multiple times.

So try it out next time you make a microwave potato, and let me know how it works for you. 

Happy Eating! 

Wednesday, April 15, 2020

The Atrocious Fetor of Celery


Celery
(Photo Courtesy of Wikimedia Commons)


I have been away for far too long. I really have no excuse for neglecting this food blog, other than I have been busy working and haven't had a lot of time for fun. Well, I am going to try and remedy that now.

Let's talk about celery. I'm not here to dissect the entire plant or discuss the different varieties and all of the different applications. For this post, I am addressing your ordinary, benign(?!?!), basic celery bunch that you can grab at the market.

I really don't hate celery, even though the title of this post might suggest otherwise. I enjoy using it in many dishes, and those dishes just wouldn't be the same without it.

My issue with celery can best be summed up by this picture that I ran across when I was browsing in Wikimedia Commons:


Stalk of the Celery Monster

Photo Courtesy of Wikimeida Commons


I don't know the history behind the above photo, but I am hoping that the person responsible is a kindred spirit, because I do feel stalked by the Celery Monster after I am in contact with celery. I seem to have a sensitivity to the odor. I know I can't possibly be the only one. I have questioned others about it but so far, they don't have an issue with celery odor. If I touch it, it lingers for an extremely long time...or at least, my nose detects it for an extremely long time. For example: If I buy celery at the market, I can still detect the odor of celery in the car the next day. It is that pervasive, for me, anyway.

I have tried to link it to an experience in the past, and the thing I could recall was an experience with a TV dinner many, many years ago. It was fried rice. I don't recall the brand. But the fried rice was so overloaded with celery that it was ridiculous. I could not even finish it. When I think of it right now it makes me want to gag. So maybe this affliction is linked to that TV dinner.

I don't have any issue with dicing onions or garlic. The lingering odor from either of those does not bother me at all. It is rather pleasant to make a dish with garlic and still detect the heady odor later. But even those odors can't compete with celery. Touching celery is like sticking a toe in "The Bog of Eternal Stench" - except you smell celery forever, (instead of smelling like the noxious odor of the bog).

I try to stay positive about celery. Mirepoix (celery, carrot, and onion) obviously would not work without celery. Mirepoix is essential for a good stock. You can make it without it, but the flavor is not the same. I have even resorted to using celery seeds in stock if there is no celery in the fridge.


Mirepoix

Photo Courtesy of Wikimedia Commons


Similarly, can you imagine gumbo, as well as many other Cajun dishes, without the Cajun Holy Trinity? No way!!!


The Cajun Holy Trinity
(Onion, Bell pepper, and Celery)

Photo Courtesy of Wikimedia Commons


Celery is an aromatic and it just MUST be used in many different dishes, all of which would suffer greatly without it. Stuffing (or dressing) for the Thanksgiving turkey; fried rice (yes, in a reasonable amount); Waldorf Salad (which would simply not be a Waldorf Salad if it didn't contain celery); and even that requisite stalk of celery in your typical Bloody Mary. That's just an extremely tiny sample of the use of celery. I could go on for days about the importance of celery, but it's not necessary. Your palate will tell you that.

But that odor!!! Holy Stench, Batman!

I would love to hear from others who have an issue with "The Stalk of the Celery Monster."

I'm hoping to be a better blog steward, especially with the extra time most of us have on our hands during this time. I have some interesting food adventures to share, so I will make a point of blogging about food as much as possible, when I'm taking a break from working in the garden & growing more food.

See you soon, Food Lovers! ♥️♥️♥️

Wednesday, October 23, 2013

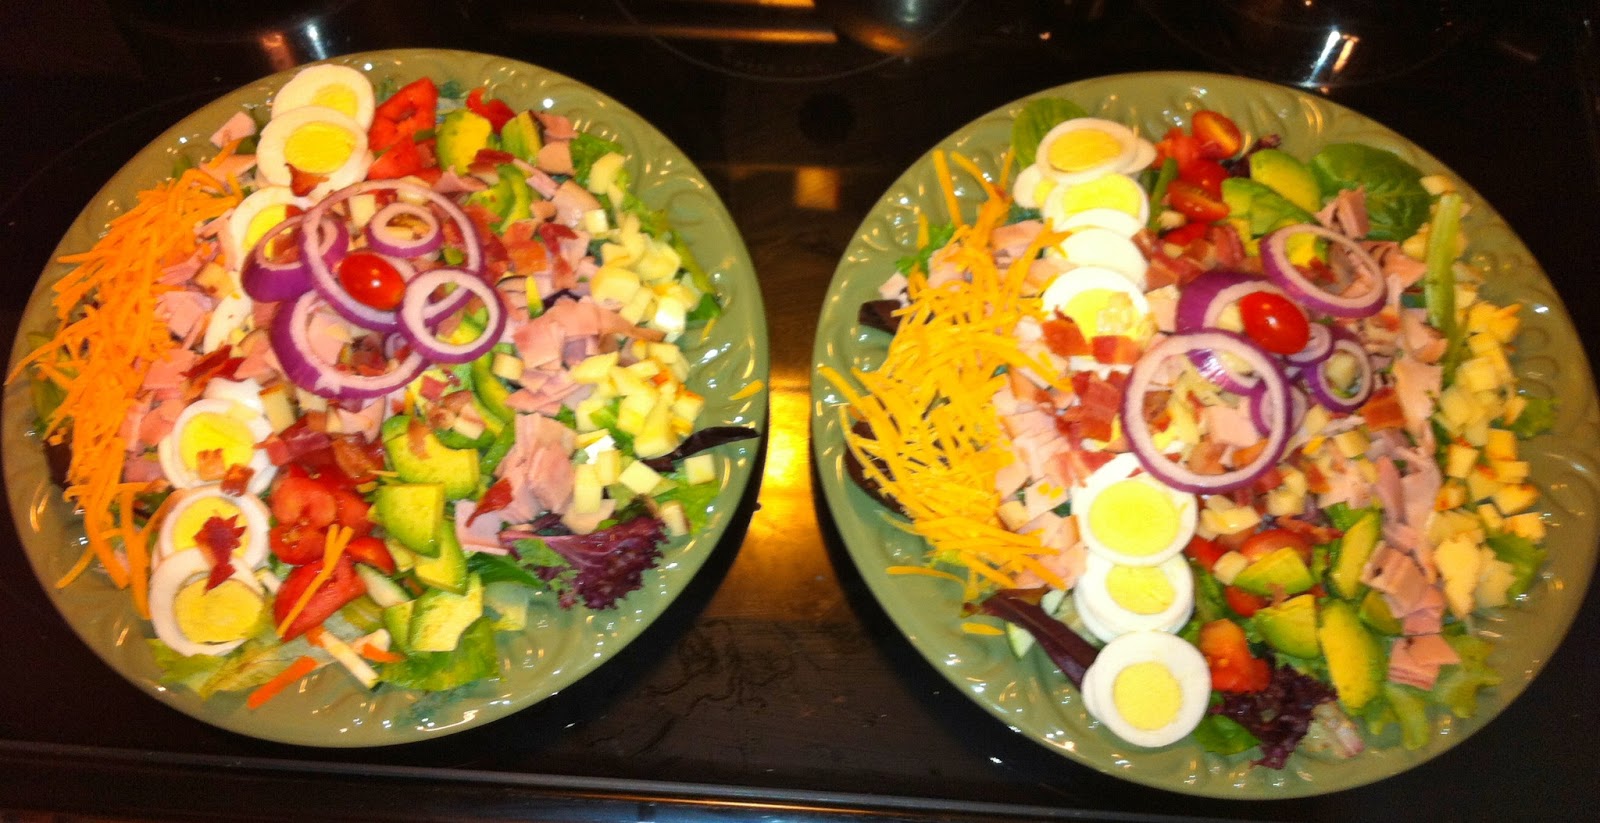
Salad of Dreams....

 Try this at home! Every day! You don't need no stinkin' store-bought salad!

I recommend: Two types of lettuce, tomatoes, cucumbers, carrots, red onion, radishes, olives, olives, olives, bacon, ham, feta cheese, cheddar cheese, boiled eggs, avocado, your favorite dressing, croutons....mmm...mmm...mmmmmm!!!!!!!! 


Wednesday, February 13, 2013

Roasted Kale, a Good Dish Indeed...

Roasted Kale: I've never eaten it and certainly never prepared it. That has changed because I ended up doing both in one day. This was the lovely food that was dinner, which also included a beautiful salad (not pictured).

Broiled Swai with a Shrimp-n-Mushroom Topping, Roasted Kale garnished with Caramelized Onions, & Mashed Cauliflower with Roasted Garlic. 

Another successful evening in the laboratory. Yahooooooo!!!!! :)

DO Try This at Home!

Monday, February 11, 2013

A Carrot Craving Turns into a Darn Good Side Dish

The word "craving" can be viewed as negative, if  you're on a diet and craving chocolate. It can be a positive thing, though. I was craving glazed carrots one day. By the time supper rolled around and it was time to cook, my brain had added a few more things to the carrots. The recipe is at the link, if you'd like to try it.


Carrot & Turnip Saute with Mango Glaze--Garnish: Spicy Toasted Sunflower Seeds


Thursday, January 31, 2013

Eat More Salad!

I have to mangle Forrest Gump's quote a bit: "Salads are like a box of chocolates, you never know what you're going to get."

Very true when you are dining out: Salads can be very good, very bad, or any point between the two.

They can also be very ugly, but as long as the ingredients are fresh, I'd chow down! But, if they are ugly as in: Rusty lettuce, dried out vegetables, looks like someone took them out to the parking lot and ran over them before service, well....Run, Forrest! RUN! 

Keep a good supply of veggies and fruits at home--that's your best bet. It takes minutes to throw a salad together and it's definitely worth it in the long run.

The stars of this yummy salad are: Leaf lettuce, baby greens, kale, broccoli, cauliflower, cucumbers, turnips, zucchini, carrots, red bell pepper, red onion, grape tomatoes, black olives, avocados & fresh mushrooms.

Go make yourself a salad right now!

Another shot of this kick-ass salad.


Tuesday, January 29, 2013

Salad: Everything but the Kitchen Sink...

Did I go overboard with these salads? Nahhhhhh!!!

The salad base, which is almost completely covered, was: Romaine lettuce, kale, a mix of baby greens, cucumbers, zucchini, turnips, carrots & cauliflower.

Top layer: Cheddar cheese, boiled eggs, smoked turkey, tomatoes, avocados, Black Forest ham, mozzarella (rolled with prosciutto & basil), Muenster cheese, provolone, bacon & red onions.

Sprinkled some chia seeds on top as well. Do you think adding the chia was too much? NAH! :)

Then we had: t-bone steaks, loaded baked potatoes, sauteed green beans and New York cheesecake for dessert. Just kidding! We had the salad and that's it. Sure didn't need anything else!

What can I say? I didn't have time to eat all day so this covered 3 meals for me. :)


"Everything But the Kitchen Sink" Chef Salad


Salad Base

Yes indeedy! There were two. Each completely consumed.

Tuesday, January 22, 2013

Let's Talk Salad for a Minute...

Salad...we should have at least one a day. Two would even be better. Even eating a simple salad made with lettuce & tomatoes is better than not eating salad at all.

Eating a simple salad can get to be monotonous, so let's jazz it up with plenty of colors, flavors, textures and extra vitamins.

Iceberg seems to be the most popular lettuce to use in salads but it is also the least nutritious. Check this link for some good information about lettuce: "Top Five Lettuce Types by Order of Nutritional Value."

Below is a salad made with a colorful assortment of vegetables. Did I go overboard? Yes. As I was building it, I said to myself: "I think we're going to need a bigger bowl!"

Here's what we ended up with in this salad: The base was Romaine lettuce and Kale.

Then the rest of the veggie gang marched in to join the fun: Turnips, stem of broccoli, cauliflower, carrots, red onion, red bell pepper, cucumber, tomato and avocado.

I wanted to share this salad with you because I feel that sometimes people feel limited when deciding to make a salad...you know, like you HAVE to have only certain veggies or you'll be breaking a rule and the Salad Police will be beating your door down and calling for your arrest.

Not so! Never be afraid to throw different veggies in a salad--ones that aren't in "conventional" salads.

It certainly breaks the monotony and you get a lot of fun flavors and textures. If you're not a big fan of cutting vegetables up for salad, invest in a "Salad Shooter," or equivalent. Those things can greatly reduce preparation time. They're small and easy to clean, unlike a food processor.

Here's to healthy eating! BOOYAH!!!!

I started out trying to be neat about it but the vegetables got a little out of hand. There's actually quite a bit of the base under there. It just got buried.

Salad Gone Wild


This was the base: Kale & Romaine


Sunday, September 23, 2012

Bitter Cucumbers--Does Cutting & Rubbing Remove Bitterness?

Old Wives' Tale?

We had a very lengthy discussion about bitter cucumbers last night. This was a big practice in our family, at least on the Czech side. Mom doesn't remember Great-Grandma Hintz (the German side) doing this, and neither do I. (I remember Great-Grandma Hintz's "cottage of tomatoes," though...that's definitely a story all its own and I'll have to remember to cover it in another post).

E.J. remembers her mom doing this (her mom was my great-aunt, Albina). My Czech grandma, Nan and Aunt Albina swore that this helped remove the bitterness in cucumbers. Their parents told them so, and so they continued the practice unfailingly.

The consensus as of last night is this: E.J. still faithfully executes the practice of rubbing. Mom does it only once in a while. I don't do it at all any more because I stopped being a believer some years ago.

This doesn't mean I am shaming my ancestors or being unloyal to them, as the tone in E.J.'s voice suggested when I told her that I don't do it anymore.

I don't do it anymore because I don't believe it works. There. I said it. I don't believe it works because some years back when we had a bountiful explosion of cucumbers in the garden, I did some experimenting on my own.

I noticed that the bitterness was at the stem end most of the time. Sometimes it did travel farther or was even in other areas but for the most part--the stem end was the problem. So I just started cutting off the stem end (and farther up if necessary).

I noticed that when there was bitterness in the cuke, there was usually an area that looked drier and spongey. I thought it might be related. (I also noticed that if I forgot to water the garden and the cucumber vines got too dry, the cukes were almost always bitter).

We didn't have the internet back then and I didn't go tearing off to the library to get into the reference books. I had plenty of cucumbers to study.

Cucumber Pickin' on the World Wide Web

After our lengthy discussion last night, I decided to do a little research and see if I could find some definitive answers about rubbing the cut end of the cucumber to the other end in order to remove bitterness.

It was an interesting search. I found that the practice is not limited to the South. It's all over the U.S. It's not limited to Czechoslovakians, either. There are Germans who engage in this practice. Some Canadians do it. I found some British practitioners, too. I found practitioners in India as well, but in that instance, I found that the family rubbed the cut end on the cuke to get rid of "latex." (Is the word latex in India exchangeable for the English word for bitter? I don't think so but I didn't look into that little tidbit in depth).

There were variations in the way to do it, and different explanations as to why it worked. Some Canadian practitioners said you must cut both ends off and make notches on the ends before rubbing. An American variation stated that you must sprinkle salt on the end before rubbing.

All of the practitioners that I discovered while I was searching were doing this because it had been passed down the family line. I couldn't find any hard scientific data about this practice. (Yes, I even checked "Snopes," but the only discussion about it was limited to the message boards.)

Am I lookin' for cukes in all the wrong places?

I did find some information at Washington State University about removing bitterness from cucumbers. Cut off the stem end and/or peel the cucumber. You can also slice it, salt it and let it sit for a while, then rinse and prepare as normal. No mention of rubbing.

So Does it Work or Not?

I noticed that many people who engage in this practice either claim that the bitterness is the foaming that is produced by the rubbing or that the bitterness is removed by the "capillary effect." The "capillary effect" subscribers claim that the bitterness always runs underneath the skin of the cuke.

Everyone has explanations about why this practice supposedly works and variations of the practice.

Well, I vote no. It doesn't work. I apologize to any ancestors or anyone else that I may be offending or if it seems like I am blaspheming to make this admission, (I guess E.J. thinks I am nothing but a Benedict Arnold), but I just don't believe in this anymore. That doesn't mean that I don't believe in magic, especially "Kitchen Magic," but this? No.

Show me some definite, hard facts and I will change my mind. Find me a white-haired scientist with bushy eyebrows that conducted actual physical experiments on cucumbers and then measured the results with delicate instruments.

Oh, and I have to add: the bitter cukes are most common if you raise them yourself or buy them at farmer's markets and such. The variety used for pickling seem to be the most susceptible. Another "official" site claimed that commercially grown cukes are bred so that the amount of bitter compounds are reduced. (I can't find the site now but I'm sure that this is probably true since we live in a world of "Frankenfood.")

I would love to know the origin of this practice. Does your family do it? Please leave me some feedback. It really is one of those great mysteries. We'll call it: "The Cucumber X-Files." I think this mystery would leave Mulder and Scully in a pickle. Ha ha ha! ;)

Have a great day! :)


                                                   Hot Dog! He's a Pickle Pickin' Puppy!   
 
                                               (Photo courtesy of Electron at Wikimedia Commons).