I also posted a narrated version on TikTok which is a little shorter. This YouTube video is set to music & text directions & descriptions.
I also posted a narrated version on TikTok which is a little shorter. This YouTube video is set to music & text directions & descriptions.
 I love food. I love talking about it, creating wonderful dishes, and feeding people. The kitchen is my happy place and I love conducting experiments there, whether the dishes are savory or sweet. I like to blog about it when I have time, in hopes that I might help or inspire others. I don't consider myself a food snob, though I am picky about how certain meals are prepared. I'm happy with a simple meal at home, like beans and cornbread, as well as a meal in a fine-dining establishment (and everything in between). I hope you enjoy my blog and leave me some feedback if you have time.
 |
| Nan Taters in Action |
I have posted about this potato recipe before, but it bears repeating, because they are so good! I have searched the internet trying to find a similar recipe, I know there must be some out there. The closest recipes I have found using the "evaporation method" are recipes touting "Syracuse Salt Potatoes," and an almost identical version from Colombia. Both of these use approximately 1/2 cup of salt per pound, and involve whole, small potatoes. (And I am definitely going to try those recipes.)
But this recipe is not the same. While you can use whole, small potatoes, bigger potatoes can be used as well. The best potatoes to use are waxier potatoes (like Yukon Gold, or New Potatoes). About a teaspoon of Kosher salt is used, along with 2-3 Tbsps. of oil during cooking. Butter is added after they're done.
My Czech grandmother, "Nan," made this recipe often, so I dubbed them "Nan Taters." I don't know if she saw it somewhere, or if she just decided to do it to see what would happen. She did do a lot of experimenting in the kitchen, so I think it might have been the latter, unless someone in her family made them in the past. Unfortunately, I can't ask her now, and back then asking didn't occur to me. All I knew was that they were really, really, really good...I could never get enough of them, and I could have easily eaten a whole pot of them by myself (and I could have gotten away with it with no calorie regrets too, at that age. 😄)
Once in a while she would fry them directly after the evaporation process, but most of the time she would leave them in the "sauce." She made a German version a lot too, since my grandpa was German. She probably made every version imaginable, and then some, because he loved to have meat & potatoes every day.
For this recipe, the potatoes from her garden were used until the supply ran out. She grew a LOT of potatoes! These were the absolute best ones to use, but using store-bought potatoes works really well too.
I thought maybe there was a Czech or German tie to this recipe, but I haven't found one yet. If you have made these, or have family members who have, please let me know. I really thought I would find pages and pages of this recipe because it is SO GOOD. But...nope, and I used many different search terms. More people need to try this recipe, IMO, so I am posting it here again.
 |
| Well on the way to creamy goodness! |
Tools: A saucepan/frying pan, 10-12 inches (or larger, if you want a really big batch).
Ingredients:
Yukon Gold or New (Red) Potatoes (amount depends on size of pan)
Water to cover
1 tsp. salt
2-3 Tbsps. oil (I use avocado or extra v olive oil)
2-3 Tbsps. of unsalted butter
Ground black pepper (add at will)
Method:
1. Wash potatoes thoroughly. If you are using large potatoes, cut into bite-sized pieces. Cut enough so there is only one layer on the bottom of the pan (your mileage may vary depending on pan size). 3 medium potatoes worked well in the 10" stainless steel pan that I used.***
2. Add water to cover, the salt, and the oil.
3. Bring to a rolling boil. Crank it up! Once it gets going it almost sounds like applause.
4. Stir once in a while. Once your water has almost completely reduced, test one of the pieces to see if it is done. If not, add a little more water and cook longer. Repeat if needed until the taters are tender.
5. The "sauce" is made from the starchy water, so don't let them evaporate all the way unless you are planning on frying right away. If you want the creamy version, let the "sauce" remain and add the butter & pepper. Stir well & add more salt if needed. You can make it as thick or thin as you like. (Just add a little more water if you think your sauce is too thick.)
From here you can serve them as is, or add cream or milk and mash them. The flavor is out of this world good, and all of the nutrients remain instead of going down the drain.
I confess that I made some last night and there were no leftovers. I just called my last portion "dessert." 😆
***NOTE: I did not rinse the potatoes after cutting like I usually do. You can do that if you feel the need. There will be less starch after evaporation, but it will still be enough to make the "sauce."
So here they are again. Give them a try and let me know what you think. If you have any issues, or my instructions aren't clear enough, just let me know and I will fix them. The finished product should be so good that you could eat the entire batch by yourself. If that is not the case, notify me immediately so we can troubleshoot!
And again, if you have info about other versions of this recipe (if you make it or know anyone who has), please share it with me! I love food history & I would like to know why I have never seen it on a restaurant menu anywhere. It could easily be held on a steam table until service, like some other potato recipes.
Thank you! 😊
 |
| Creamy Goodness Right Here!!! |
I love food. I love talking about it, creating wonderful dishes, and feeding people. The kitchen is my happy place and I love conducting experiments there, whether the dishes are savory or sweet. I like to blog about it when I have time, in hopes that I might help or inspire others. I don't consider myself a food snob, though I am picky about how certain meals are prepared. I'm happy with a simple meal at home, like beans and cornbread, as well as a meal in a fine-dining establishment (and everything in between). I hope you enjoy my blog and leave me some feedback if you have time.
I started thinking about a stovetop version of green bean casserole a few months ago. I decided to try it out just for the heck of it to see if it would be as good as the oven method. Finally got a chance when I happened to have 1/2 can of mushroom soup hanging around, along with an open package of crispy onions that needed to be used up. So I decided to go for it, using one can of green beans.
This method can come in handy, especially around the holidays when and oven gets a workout and some dishes have to take turns. Also great if you don't have an oven, or if you get a craving for this dish but don't want to heat up the kitchen with the oven. If you have a microwave but no oven, you can still use part of the recipe, because obviously the crispy onions MUST be toasted. It's just not the same if they aren't.
Also, some things just don't work well in the microwave. I have started this dish in the microwave & finished it in the oven before, when time was short, but there wasn't a problem doing it that way. Microwave only? No way!
Sometimes I see posts that mock this dish, but I would really miss it if I didn't have it at least once during the holiday season, or for cravings at other times of the year. Nostalgia food. Comfort food. All good as long as you don't make it a weekly habit. 😁
It turned out really well on the stovetop, next time I will let it simmer a little longer, but other than that, it was very satisfying with the crispy onion topping.
First: toast your onions. I used a stainless steel pan and it worked just fine. A bonus with this method is you can leach some of the oil out of the onions if you let them rest on some paper towels while you prepare the rest of the dish, and leach out a few calories too. 😆 Otherwise, just put them in a bowl & set aside. Also, if you like them darker, go for it. These were dark enough for me after toasting.
 |
| Before Toasting |
 |
| After Toasting Next, wipe out the pan out with a paper towel, (or not). There will be bits left in the pan from the onion toasting. I left those in. Add the soup & milk. Add a little pepper, mix well, drain beans, and add those in. Let this simmer & reduce for a few minutes. |
 |


 I love food. I love talking about it, creating wonderful dishes, and feeding people. The kitchen is my happy place and I love conducting experiments there, whether the dishes are savory or sweet. I like to blog about it when I have time, in hopes that I might help or inspire others. I don't consider myself a food snob, though I am picky about how certain meals are prepared. I'm happy with a simple meal at home, like beans and cornbread, as well as a meal in a fine-dining establishment (and everything in between). I hope you enjoy my blog and leave me some feedback if you have time.

This one takes a little more elbow grease than "cheater garlic bread," but it is absolutely worth it. Use FRESH garlic too, not the one that's already peeled and minced. Fresh.
Use your favorite bread, whether homemade or store-bought. This recipe is enough to cover 2 halves of a loaf of French bread. You could do slices as well, if that's what you fancy.
I used:
About 3/4 of a stick of unsalted butter. Or you can go ahead and use all 8 Tbsps. Either way, leave the butter out until is softens. Spreadable, but still firm. (It works better this way instead of melting the butter. It's more of a PITA if you melt it, let's just put it that way. Melting is great for spreading the butter, but the minced garlic has to be shoveled on with a spoon & won't spread evenly. So...no. Don't melt it.)
Garlic...I used an entire bulb for this. Use a garlic crusher if you have one. It makes life easier. I also used one of the tubes made for peeling garlic. Otherwise, you'll have to peel one by one with your knife, or smash them to release the peel.
S&P - I seasoned with Kosher salt & some pepper
Oil - I used 2-3 tsps. of avocado oil
1 tsp. of garlic powder (not garlic salt). Because...why not?
Mix & mash together until well combined, then slather it on your favorite bread.

You can add other things too: herbs, your favorite cheese or cheeses, red pepper flakes, (or even more fresh garlic, if an entire bulb isn't enough for you). I was just itching for some good garlic bread, and that was the goal here.
Toast the halves or slices in your oven until they reach your desired doneness. I let it get a little toasty on the edges, but that was it. I didn't want the garlic to burn. Alternatively, you can put the halves back together and just bake for a bit, but the results are better if you toast the halves, so the yummy garlic butter can melt into the bread.
A great accompaniment for any meal, but it can also be a meal by itself. That is up to you. All I know is that I really enjoyed the chunk I had for breakfast the next morning. 😀
 I love food. I love talking about it, creating wonderful dishes, and feeding people. The kitchen is my happy place and I love conducting experiments there, whether the dishes are savory or sweet. I like to blog about it when I have time, in hopes that I might help or inspire others. I don't consider myself a food snob, though I am picky about how certain meals are prepared. I'm happy with a simple meal at home, like beans and cornbread, as well as a meal in a fine-dining establishment (and everything in between). I hope you enjoy my blog and leave me some feedback if you have time.

I still have an issue with the guy who posted a video and tried to convince people that their veggies at home were not as good as they are in a restaurant. It just totally rubbed me the wrong way. He tried to claim that the "secret ingredient" that makes restaurant veggies taste so good is...butter.
In the first place, I want to know where in the world he is getting all of these wonderful restaurant veggies, because the majority of the time, veggies are an afterthought in a restaurant. They are usually overcooked, undercooked, over-seasoned, or under-seasoned. And by over-seasoned, I mean salty AF. At least with under-seasoned, you can add what you want.
So, unless you are dining at a 5 star restaurant, (and sometimes not even then), your average side-order veggies are a disappointment. I would say...99% of the time. That has been my experience. Your mileage may vary. 😀
Forget what he said. It is just pure BS. You can make veggies at home that far surpass any restaurant veggies. It's the cooking method, not the 5 pounds of butter, that make veggies good. They don't need a lot of adornment, but you can go that way too, once the cooking method is down pat.
Back to the broccoli. Unless I'm planning a broccoli casserole or broccoli soup with the leftovers, I usually just grab a good-looking crown of broccoli instead of a big bunch. That gets us through a meal with maybe enough left over for lunch the next day. (No guarantee on that though. It might all be consumed the very night it is made.)
Either way, first rinse your broccoli. If you have a designated spray bottle for vinegar that you keep next to the sink (and if you don't, you should), spray it with that first. Then rinse & set it aside for a few minutes.
For just a crown, I use either a 2-quart or 4-quart saucepan. Fill it 3/4 of the way up, add about a teaspoon of Kosher salt (less if you use granulated salt), and set it to boil.
Then process your broccoli. Cut the crown into florets, and try to make them somewhat the same size. Cut them in half if necessary. But don't make a big deal out of it, as long as it's mostly uniform, you'll be fine. Peel and dice the stem too.
Rinse again for good measure, then add to the saucepan after the water has reached a rolling boil. Stir, bring back to boil, then turn down to simmer. It will take 6-8 minutes before it's ready.
The pic above was taken after the water started to boil again. You can see it floats. Pennywise would approve. 😀
In this next pic, you can see that the broccoli has started to go below the surface. That's when you want to pull it. Sometimes I let it cook for about another minute once it dips below, but most often I pull it.

 I love food. I love talking about it, creating wonderful dishes, and feeding people. The kitchen is my happy place and I love conducting experiments there, whether the dishes are savory or sweet. I like to blog about it when I have time, in hopes that I might help or inspire others. I don't consider myself a food snob, though I am picky about how certain meals are prepared. I'm happy with a simple meal at home, like beans and cornbread, as well as a meal in a fine-dining establishment (and everything in between). I hope you enjoy my blog and leave me some feedback if you have time.

Yes, a really long title. I might change it. We'll see. Or maybe I'll add one more word with 2 syllables. Then it will be the correct cadence for a song. 😆
How about: "Easy Smothered Creamy Dreamy Mushroom-Garlic Pork Chops?" 😆
This recipe has been in meal rotation here for many, many, many years. It comes up every once in a while. It is not a weekly thing. I can't remember where it came from. I don't remember if it was family related. I know I didn't get it from a cookbook, though it is likely that it's in one (or 10,000) somewhere. And if not, then it should be.
It's easy, and it can get even easier and still be tasty. The version in the pic above took a little more time, but not that much. This recipe serves 2, if you're planning on each person getting 2 chops (which is always a fair amount, though it is over the recommended amount). And when I say "fair amount," I mean fair as in evenly divided and fair as in a large amount, but not too large (unless you are following the chart re: servings of meat per meal or per day).
They turned out so tender and lovely. No knife required. Great flavor.
You'll need:
4 pork chops (thinly sliced. You can use thicker, but add extra cooking time)
Mushroom soup (canned or equivalent amount of homemade)
Milk (which you won't need if you use homemade mushroom soup)
*****1 med. garlic clove - use fresh if you have it! The powder just doesn't cut it for this one.
S&P
Oil for sautéing (extra virgin olive oil, avocado oil, or whatever you normally use)
Approx. 3/4 c A/P flour for dredging.
You can do this in one pan if the pan you are using is oven friendly. Otherwise, a baking dish large enough to hold the chops will be necessary.
Method:
If you are using a separate baking pan, just put a small amount of the soup on the bottom, then the chops, sprinkle with garlic, then pour the rest of the soup over the top & cover before baking.
You can also make this dish without sautéing. I have done it more than once in the past when I just didn't have time or energy to brown the chops. It is still really good this way, but it is over the top good if you brown the chops first. Over the top & beyond if you use homemade mushroom soup.
I'm not sure if I ever posted a good mushroom soup recipe on the blog, but if I haven't, I'll do that real soon. It's pretty easy. The biggest PITA is chopping the shrooms. 😄 Other than that, it's NBD.
***Alternatively, you can just make a mushroom gravy/sauce if you toss some sliced shrooms in the pan (4 to 6 oz.) After pulling the chops out, drain the oil until 2-3 Tbsps. remain and sauté until slightly brown. Let most of the liquid evaporate. Then toss in some flour (2-3 Tbsps.). Keep stirring & let flour cook for 3 minutes (still the sweet spot for getting rid of the raw flour taste, as far as I know.)
Add milk a little at a time until the sauce is thick enough to coat the back of a spoon. You can also use a little water or stock if you don't want to go crazy with the milk. Add a little heavy cream too, if you have any. Maybe 1/4 c or so.
Taste & adjust salt if needed. Then proceed with the rest of the recipe. That amount should be enough for the dish. I'll run a check on it & adjust here if needed (hopefully I won't have to, but it's possible).
I love food. I love talking about it, creating wonderful dishes, and feeding people. The kitchen is my happy place and I love conducting experiments there, whether the dishes are savory or sweet. I like to blog about it when I have time, in hopes that I might help or inspire others. I don't consider myself a food snob, though I am picky about how certain meals are prepared. I'm happy with a simple meal at home, like beans and cornbread, as well as a meal in a fine-dining establishment (and everything in between). I hope you enjoy my blog and leave me some feedback if you have time.

Secret or not so secret. For all I know, many do this already. But if you don't, please check it out, because this version is a really good one. This is not my opinion only though. These were field-tested. 😆
I was actually looking for something neutral to use because we were getting low on mayo, and also because I get tired of running out of filling before all of the eggs are filled to a reasonable capacity. Not a problem with this recipe. There was plenty of filling with a little left over after overloading the egg halves. Say....YEAH!!!!! That's what I'm talkin' about!
Non-traditional format for recipe posting because as I was typing it out, I just typed out exactly what I did and in what order. So that is how I am posting it here:
Boil 12 eggs in your usual way. (My way is to start them in cold water, set timer for 20 minutes, turn them off when they reach a rolling boil, then pull them when the timer goes off.)
This yielded 12 yolks & 3 white halves that didn't make the cut. Mashed them finely with a potato masher. (Actually, it would probably be considered a bean masher because of the smaller holes. Or heck... just use a fork. That would work too. lol)
I love food. I love talking about it, creating wonderful dishes, and feeding people. The kitchen is my happy place and I love conducting experiments there, whether the dishes are savory or sweet. I like to blog about it when I have time, in hopes that I might help or inspire others. I don't consider myself a food snob, though I am picky about how certain meals are prepared. I'm happy with a simple meal at home, like beans and cornbread, as well as a meal in a fine-dining establishment (and everything in between). I hope you enjoy my blog and leave me some feedback if you have time.

Hoity-Toity Turkey Sandwich...so dubbed because my Mom accused me of making a "fancy" sandwich with a couple of extra ingredients. 😂😂😂 (She was kidding, btw.) 😆
I wanted to ramp up the bland turkey, and I'll be dipped! It was even better than I expected.
So here are the ingredients and the order of layers, so you may capture the same great flavors. (Because we all know that the order of layers on a sandwich definitely makes a difference.)
*Please note that I used homemade Creamy Parmesan dressing (that I made for salad the night before. I'll have to post that on the blog too).
Hoity-Toity Turkey Sandwich Construction Instructions
2 slices of Nature's Own white wheat bread - toasted
I love food. I love talking about it, creating wonderful dishes, and feeding people. The kitchen is my happy place and I love conducting experiments there, whether the dishes are savory or sweet. I like to blog about it when I have time, in hopes that I might help or inspire others. I don't consider myself a food snob, though I am picky about how certain meals are prepared. I'm happy with a simple meal at home, like beans and cornbread, as well as a meal in a fine-dining establishment (and everything in between). I hope you enjoy my blog and leave me some feedback if you have time.

Question: Can I microwave corn on the cob?
Answer: Yes! Absolutely!
If this is not on your "microwave list," please add it with confidence. I am totally addicted now, thanks to my Mom.
Just peel back the shucks, remove the cornsilk, rinse, then pull the shucks back up. Microwave for 2 1/2 to 3 minutes.* Done and done! Perfectly cooked, excellent flavor. Add your favorite toppings.
I didn't consider this to be a good food item to cook in a microwave. I never even gave it a thought. I'm not even sure where Mom found out about it, but I would love to send that person a big "thank you."
I have not yet tried it without shucks, since we were in season when this craze started in our house. Maybe damp paper towels would suffice. I will update later when I try it with "shuckless" corn. 😄
*Note:: Instructions fit microwaves that are 1200 watts.
I love food. I love talking about it, creating wonderful dishes, and feeding people. The kitchen is my happy place and I love conducting experiments there, whether the dishes are savory or sweet. I like to blog about it when I have time, in hopes that I might help or inspire others. I don't consider myself a food snob, though I am picky about how certain meals are prepared. I'm happy with a simple meal at home, like beans and cornbread, as well as a meal in a fine-dining establishment (and everything in between). I hope you enjoy my blog and leave me some feedback if you have time.
Vegetable Vexation?
I'm here to defend my vegetables, because one day I watched a video that popped up on Facebook. The topic was: "Why don't the vegetables you prepare at home taste as good as vegetables from a restaurant?"
Huh? I was perplexed. I have always encountered the exact opposite. Well, with rare exceptions. The vegetables from restaurants are usually sub par -- overcooked, treated as an afterthought, etc. Unless you are dining at a "high end" restaurant or an independent "farm to table" type of establishment, that's just the way it is - (and sometimes those are questionable as well, because paying more money does not necessarily equal good food).
Anyway, this guy reveals the "big secret." Get ready....it's...BUTTER! Restaurants use more BUTTER! Vegetables are practically swimming in it. That's why it tastes better, according to the dude.
Well, that's just ridiculous. In the first place, most restaurants don't cook vegetables to order. They either blanch & then "refresh" them per order by sautéing, or giving them a quick dip in boiling water, or they simply hold them "as is" on a steam table (and hopefully they adhere to the time limit and change them out before they turn to mush if they aren't being consumed in a timely manner). There are some restaurants that used canned veggies as well.
Not that there is anything wrong with cooking ahead of time & "refreshing," or using a steam table. These are lifesavers for busy restaurants, and if they keep up with them, then no problemo. BUT...the veggies prepared this way are in no way superior to veggies you can prepare at home. Quite the opposite.
So I have to call BS on that dude. I wish I could remember his name but it escapes me. Maybe he just has trouble with vegetables himself, so he assumes that it is a problem for everyone else too. No. No. No. Not at all. And you DO NOT need a pound of butter to make veggies taste good. Some don't need any at all. The simplest preparation yields the best flavor for fresh vegetables. For frozen or canned, a little more "decoration" might be necessary. 😄
As an example, see the veggies below. Fresh spinach, green beans, and Brussel's Sprouts. (There were also fresh potatoes with this meal, just peeking out up there on top.) All of these were from Costco. The green beans, unfortunately, were a mixed bag, as you can see. Different shades of green. Some of the beans were not as fresh as the others. You don't see that when you pick them fresh from your own garden, but this was earlier in the year before Spring, so Costco filled the veggie bill.
Fresh spinach: Use a large frying pan, medium heat. Add 1-2 tsps. of light oil (avocado or extra virgin olive oil). Spread the oil around so it coats the bottom of the pan. Add 1/3 of the spinach, let it wilt a bit. Repeat 2 more times. Make a small well in the center & add one clove of minced garlic (optional). Stir the garlic a bit & let it cook for 1 or 2 minutes, then mix it into the spinach. Add S&P to your taste.
This is a short-cut method & it is very tasty. The moisture in the spinach will steam it. No need to add extra water or boil it first before sautéing. This was one of the giant containers from Costco. 16 oz., if I recall correctly. So the recipe fits for that, but it doesn't need much adjusting if you have a smaller amount. Of course, with spinach, you want to have as much as possible since it shrinks so much.
Fresh green beans: Bring salted water to a boil & add green beans. Cook to your specifications. I like mine al dente. That part is up to the cook. Just fish one out for a test after 8-10 minutes.
Brussel's Sprouts: Nice big bags of these at Costco, already removed from the stalk. Most of the time rinsing is all you need to do, but sometimes the bottoms need to be trimmed off a little. If they are pretty big, cut them in halves or quarters. Then place in a stainless steel bowl, drizzle with olive or avocado oil, toss in some S&P, then mix until they are coated. Roast in the oven until tender, checking them a couple of times and stirring (actually, I usually flip each one with tongs). They are spectacular with a little caramelization. I could eat the whole bag.
The thing to remember with these is not to crowd them or you will have steamed Brussel's instead of roasted. I usually roast at 350 for 15-20 minutes. You can go higher if you are in a hurry, just keep an eye on them.
Taters: For waxy, thin-skinned potatoes (red or yellow), no need to peel. Scrub well & place in a saucepan. Water to cover, add salt. Bring to a boil, then turn down to medium & cook 8-10 minutes. Test with a knife, it's the best way. Then drain, add a couple of pats of butter & some black pepper, and mix. You don't need a pound to get good flavor. Sometimes I add just one pat of butter & then drizzle a little olive oil in before tossing. Yum to the max!
 I love food. I love talking about it, creating wonderful dishes, and feeding people. The kitchen is my happy place and I love conducting experiments there, whether the dishes are savory or sweet. I like to blog about it when I have time, in hopes that I might help or inspire others. I don't consider myself a food snob, though I am picky about how certain meals are prepared. I'm happy with a simple meal at home, like beans and cornbread, as well as a meal in a fine-dining establishment (and everything in between). I hope you enjoy my blog and leave me some feedback if you have time.
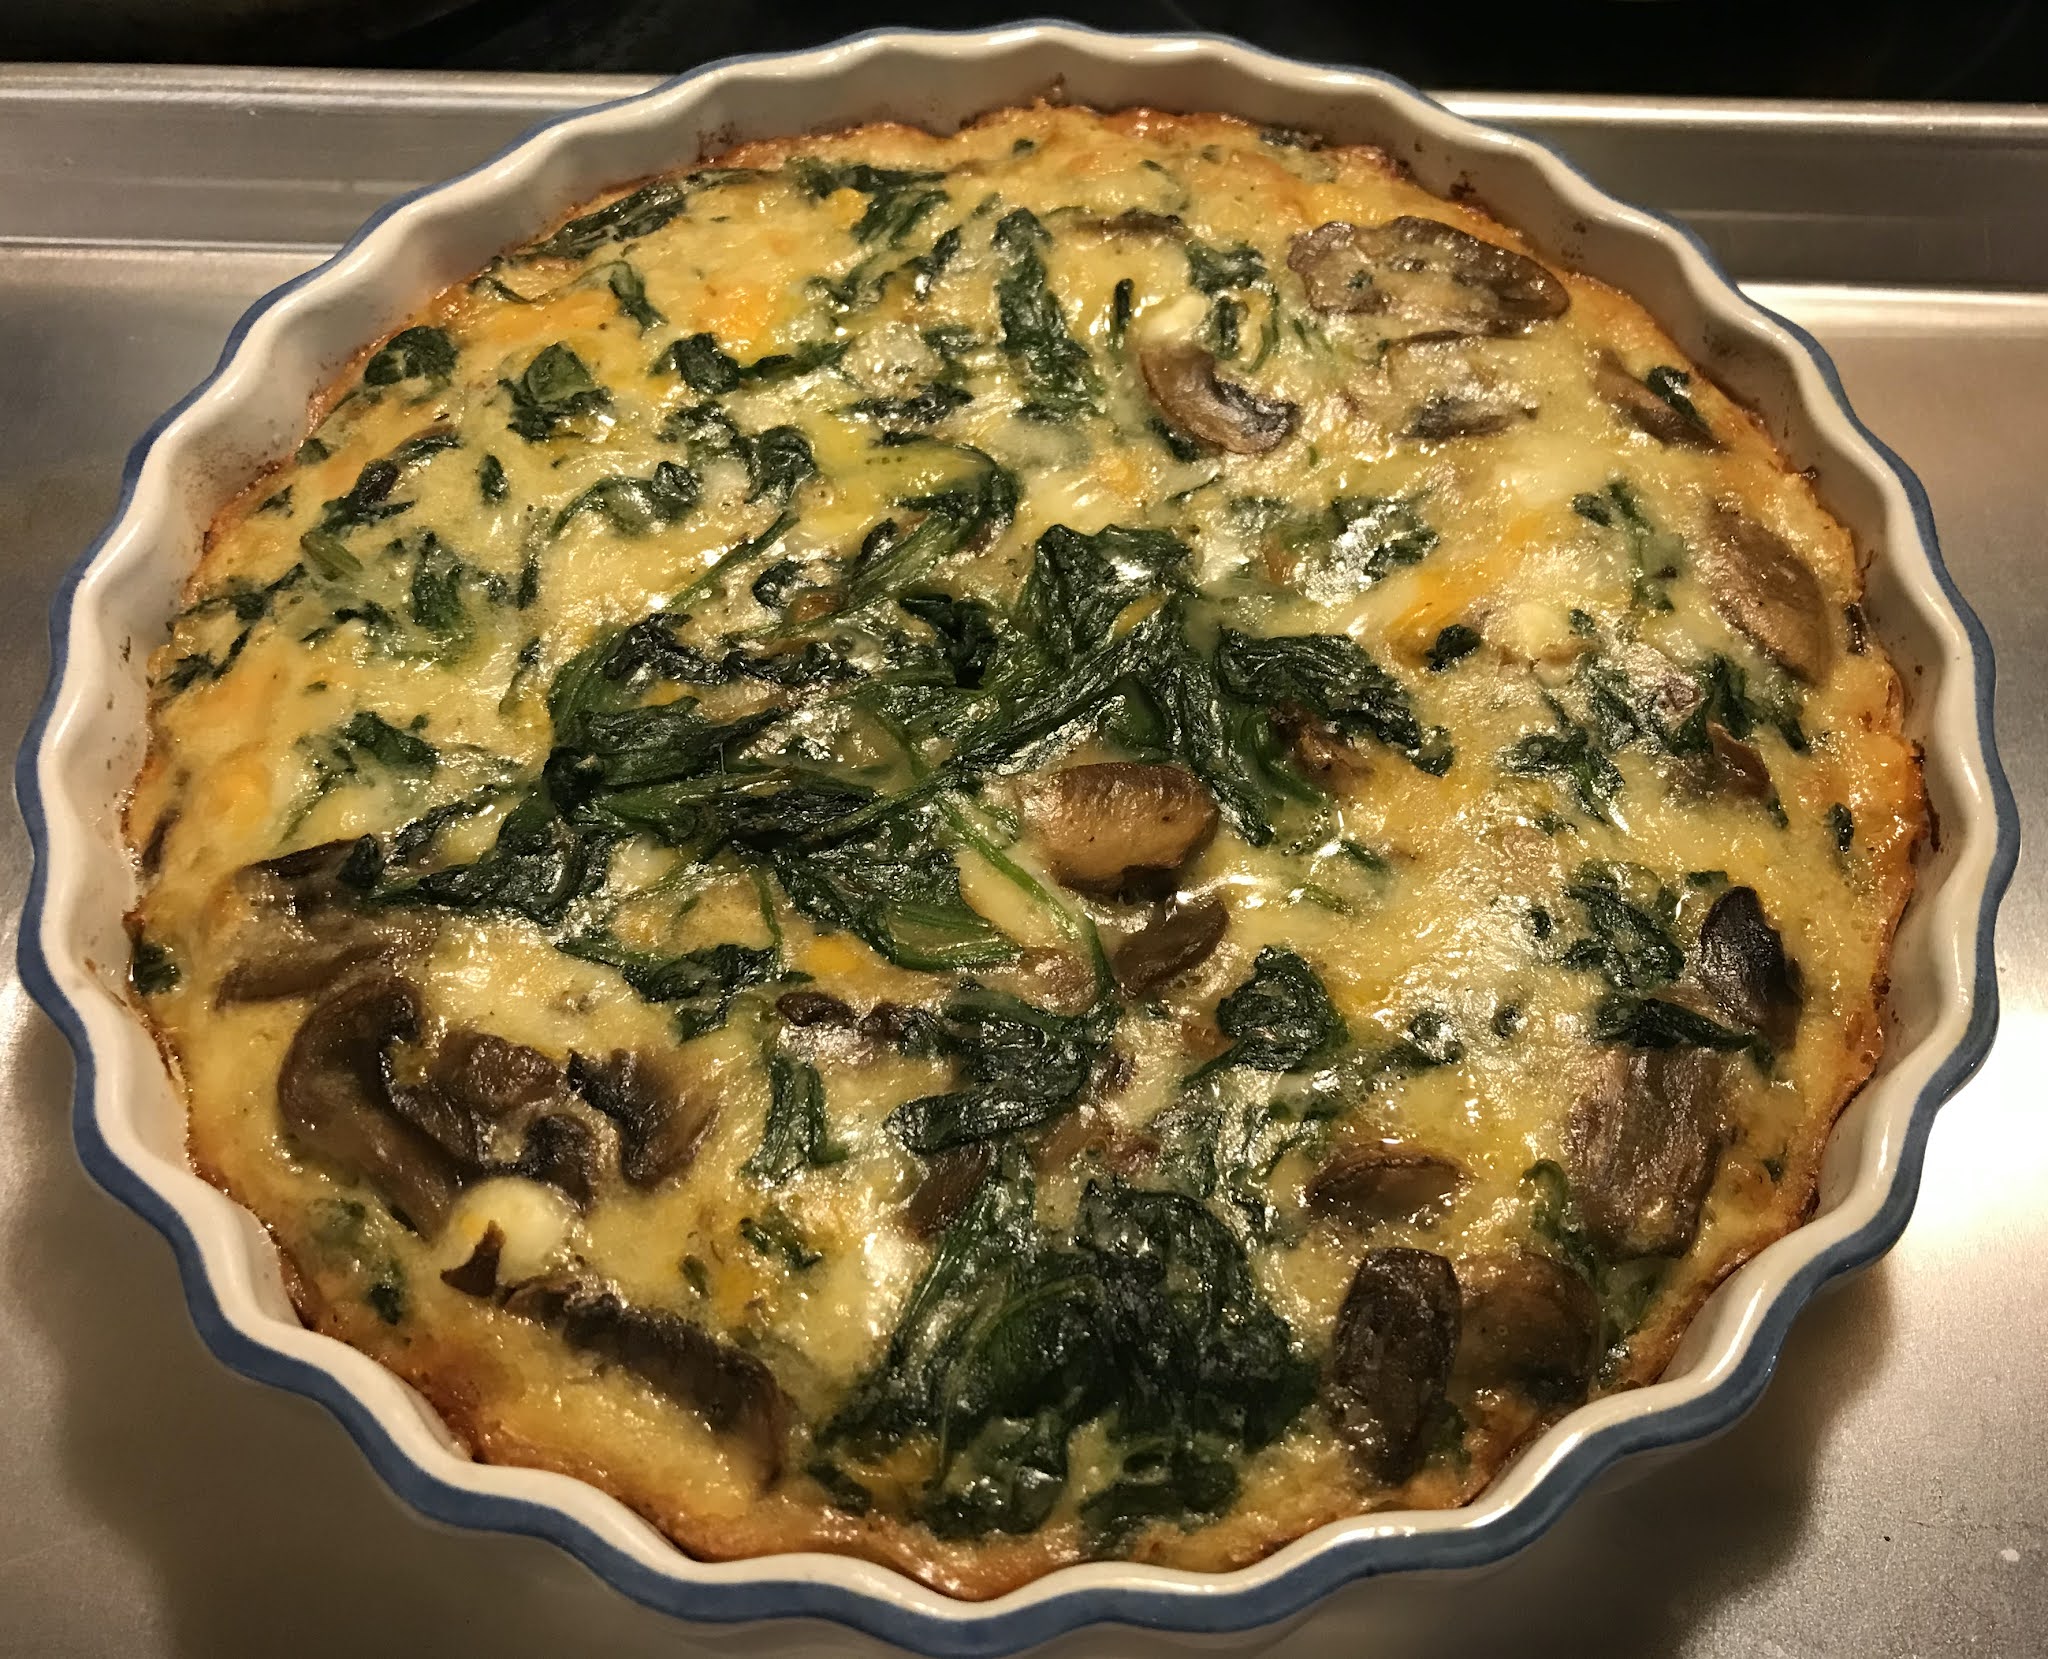 |
| Spinach & Mushroom Quiche (with 6 cheeses) Quick-n-Easy Recipe This recipe is great for a quick meal with a simple salad as as side. Preparation moves along pretty quickly, you can reduce the prep time a bit if you buy sliced mushrooms instead of whole. First, gather your ingredients and tools:
Over low to medium head, sauté Onion  I like to slice into 1/4" thick slices, but you can slice a little bigger if you want. Chop Garlic  While onions are sautéing, mince garlic. I usually use a garlic mincer, but lately I have been opting to use my chef's knife instead. When onions look like this...  ...add garlic to pan  Your onions should be pretty pliable when you add the garlic, and a little caramelized. You can let them caramelize a little more if you prefer. After adding garlic, sauté for 30 seconds to 1 minute before adding next ingredient. Add sliced mushrooms  Toss mushrooms with the rest of the ingredients, then sprinkle with a pinch of salt to help the mushrooms release their juices. (I always use Kosher salt in my recipes, with a few exceptions.) When the mushrooms look like this...  ...add 1/2 of the fresh spinach & toss with the other ingredients  After the spinach wilts a bit...  Add the rest of the spinach & toss with the other ingredients...  Sauté until spinach is completely wilted.  Sprinkle with another pinch of Kosher salt while sautéing. The spinach needs to wilt--so no need to cook it any longer after that, since it will be cooked again in the oven. Just set it aside to cool. (If you opt for frozen spinach, thaw it out ahead of time and squeeze as much liquid out of it as possible by using spoon and a sieve.) At this point, set oven to 400° and prep the rest of the ingredients. Grate your cheeses  I ended up with six cheeses in this quiche: Swiss, Monterrey Jack, Cheddar, Mozzarella, Asiago, and Feta. The total amount was pretty close to the total amount in the ingredients list above, though it may have been a little more. You can mix it up any way you like -- using white cheeses with spinach is my personal preference. The feta is really optional, but do use it if you have it. It adds extra little pops of intense flavor. Prepare the batter 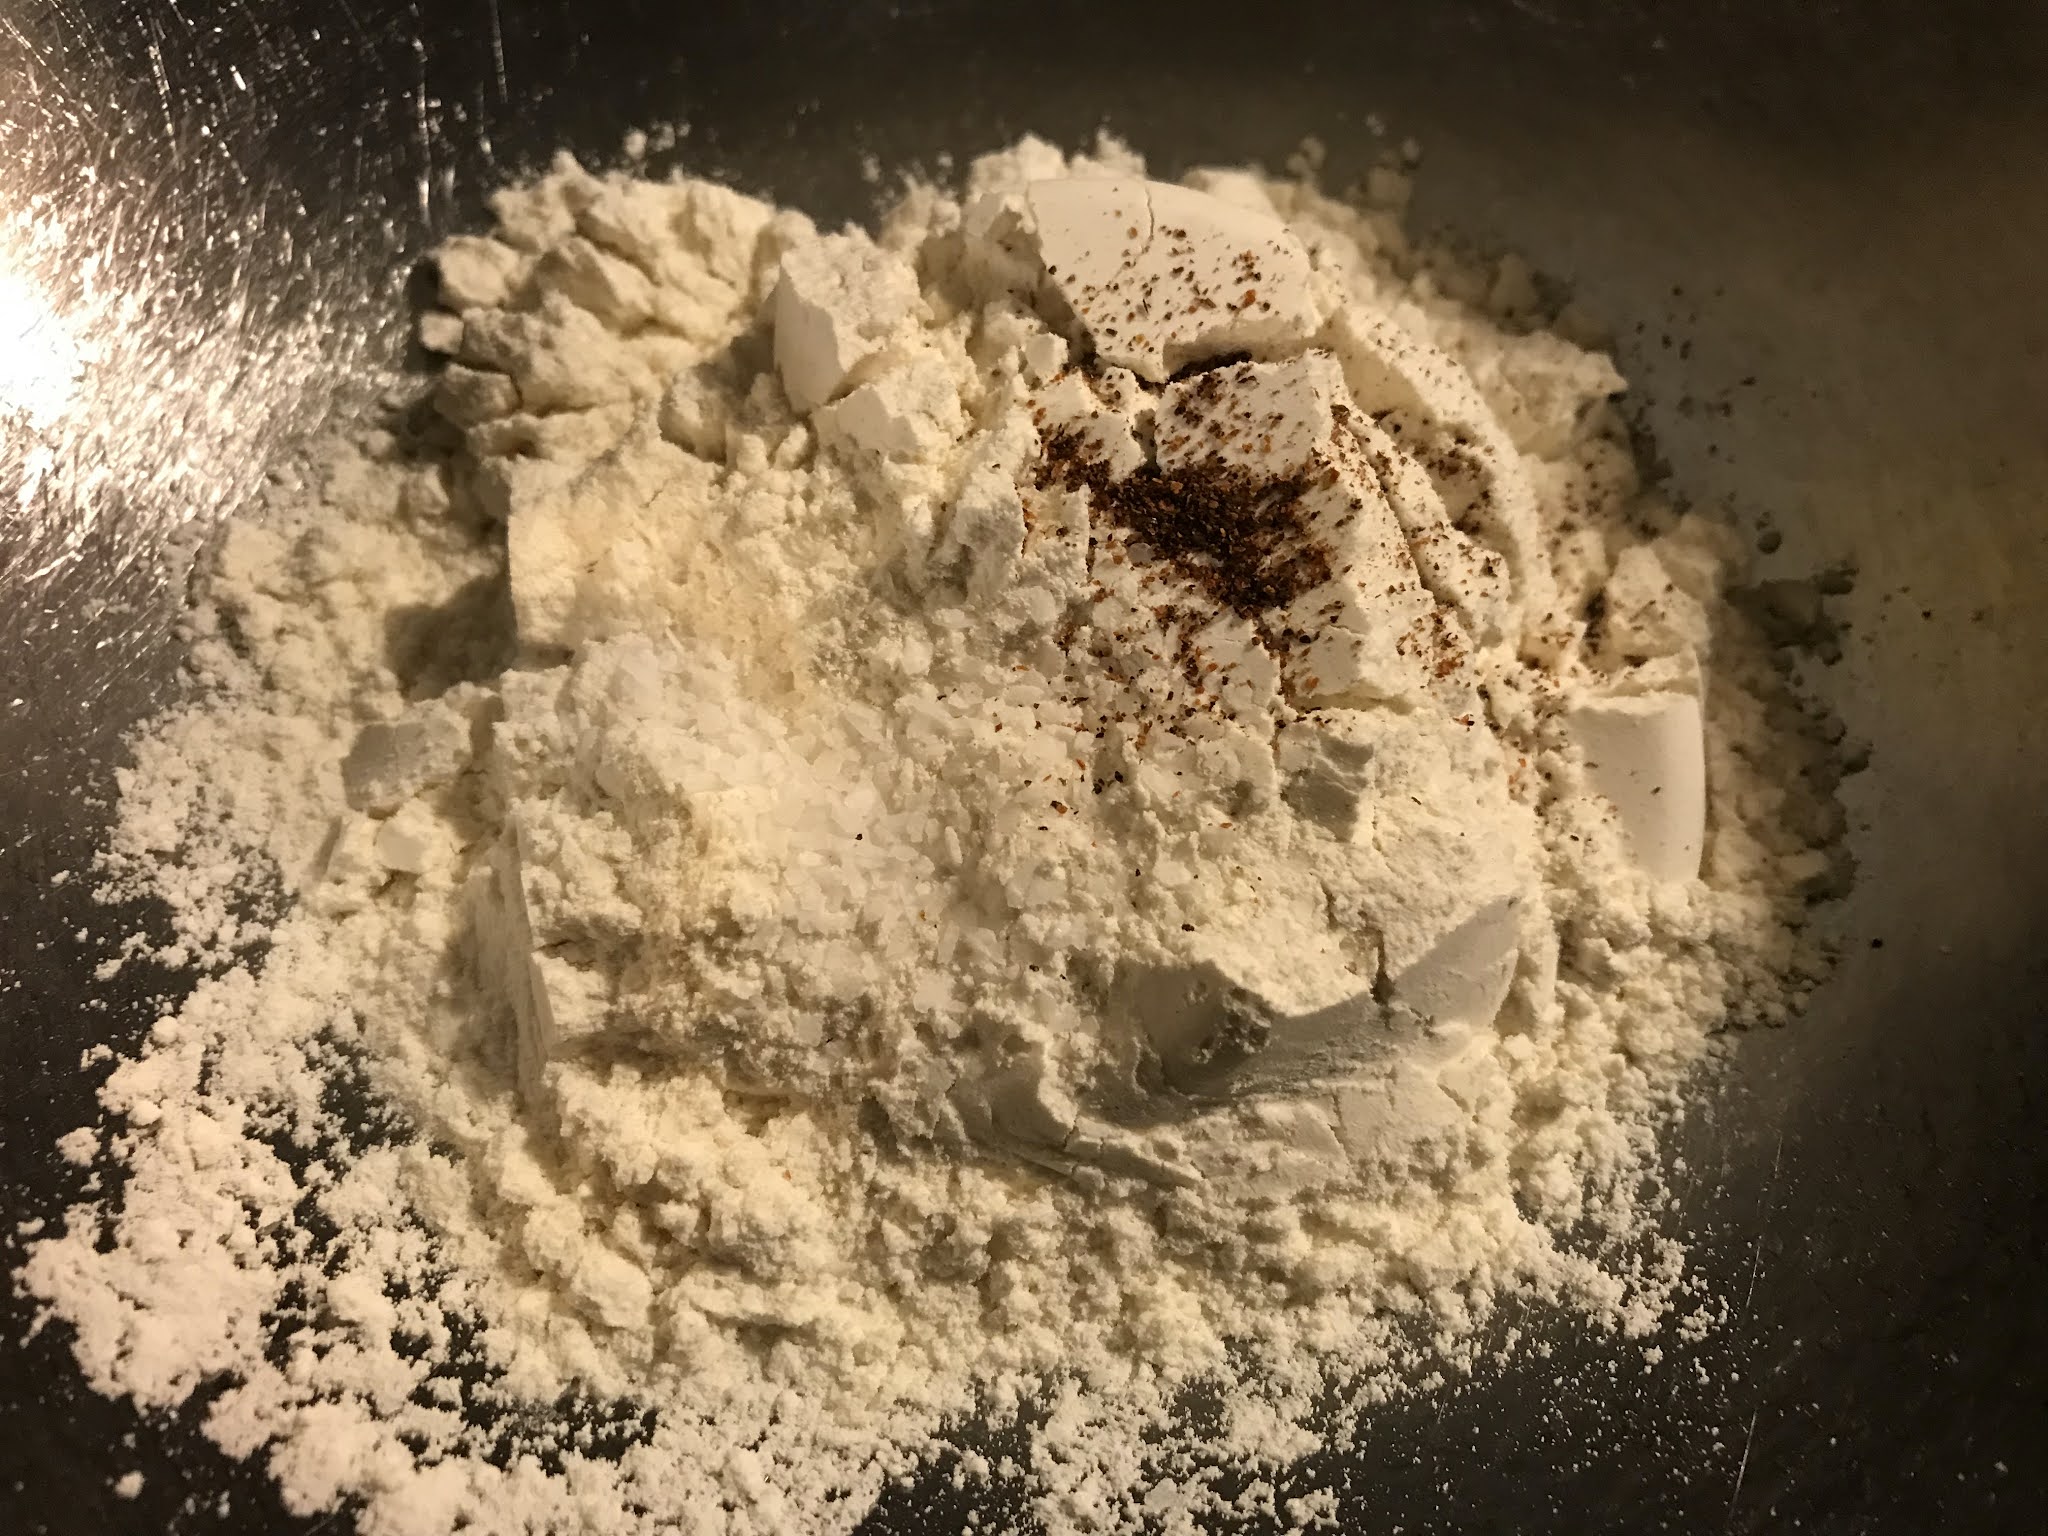 Whisk flour, baking powder, salt, and cayenne together in a mixing bowl until well combined.  Add 1/2 & 1/2 to dry mixture and whisk together, then beat eggs in a separate bowl until well mixed. Add eggs to batter and whisk until thoroughly combined. (*Note: In the interest of saving time, I used 3 whole eggs this time, instead of 5 yolks and 1 whole egg.) Fold in the cheese  Add vegetable mixture...  ...and fold in until completely incorporated  Pour mixture into oiled, 10" quiche pan  I usually place the quiche pan on a cookie sheet before sliding it into the oven. If you don't have a quiche pan, don't sweat it. Just use a deep dish pie plate or a similar shallow baking dish. I only have a 9" quiche pan, so I made a mini quiche with the leftover raw material (I just didn't bake it quite as long). Bake at 400° for 10 minutes, then kick oven down to 350° and bake for an additional 25-30 minutes. You know your oven, so check it near the end of cooking time. Test it with a toothpick or a thin knife. You shouldn't see any egg (though you might see some cheese). Let your quiche cool for 10-15 minutes... ...then enjoy with a salad or other side dishes. Let me know if you enjoy this recipe. If any part of the instructions isn't clear enough, or you notice any errors, just drop me a line. Happy Eating! 😘 |
I love food. I love talking about it, creating wonderful dishes, and feeding people. The kitchen is my happy place and I love conducting experiments there, whether the dishes are savory or sweet. I like to blog about it when I have time, in hopes that I might help or inspire others. I don't consider myself a food snob, though I am picky about how certain meals are prepared. I'm happy with a simple meal at home, like beans and cornbread, as well as a meal in a fine-dining establishment (and everything in between). I hope you enjoy my blog and leave me some feedback if you have time.
 |
| Vanilla Sponge Cake with Russian Buttercream Garnished with Macerated Strawberries & Strawberry Sauce |
Russian Buttercream
One day I was looking through some recipes for Russian desserts. In the past I've made savory Russian dishes, but never dabbled enough in Russian desserts. It was time to remedy that situation. While I was looking, I stumbled across Russian Buttercream.
What? Russian Buttercream? How did I not know about this? Three ingredients? Are you kidding me?
Nope. Three Ingredients: Butter, sweetened condensed milk, and vanilla. That's it!
That's all you need, and the recipe comes in handy when you are in a hurry and need a frosting ASAP!
As luck would have it, I already had some 4-inch cakes on hand, because I had planned to make Strawberry Shortcakes. Well, that would still happen, but with Russian Buttercream instead of whipped cream. Yeah, I know, I wasn't making "traditional" strawberry shortcakes using a sweet biscuit base, but sometimes we like to switch things up.
So I go to the food safe to find a can of sweetened condensed milk. We always have that stuff on hand. I rummage. I grab the flashlight so I can look in every corner on every shelf. What? How do we not have any? We always have it!
Classic case of: "We always have that ingredient on hand when we don't need it, but when we need it we don't have it." It happens sometimes. No rush. Testing delayed for a few days.
The Recipe
Easy as pie! (Actually easier than pie, since making a pie requires more of a time commitment.) Grab 2 sticks of butter from the fridge and set them out until they soften. They should be a little firm, not to the point where they are the consistency of Pond's Cold Cream. (Do they even make that anymore? That might be a bad example.) Not to the consistency of mayo. They should be firm, but not mushy.
Take out one can of sweetened condensed milk and have your vanilla on hand.
When the butter is ready, beat it with a mixer on medium speed for 5 minutes. It should look considerably lighter. If you're using a stand mixer, use a spoon and coax the condensed milk into the bowl a little at a time while the mixer is still running. Alternatively, just add in small increments, stopping the mixer between each addition. You can do it 3 to 4 ounces at a time. Add vanilla in at any of those points.
If your butter seems too soft or the mixture looks like it might be separating, just pop it in the fridge for a few minutes, then take it out and whip it some more. (I had to do that a couple of times because it was pretty warm in the kitchen when I made it.)
So easy. It has a good flavor and is not too sweet, and it has a silky mouth feel. You can pipe it and it will hold its shape, as seen in the photo above. If your hands are hot, work quickly or take breaks and pop the piping bag in the fridge for a few minutes.
How Does It Hold Up?
If your sweet creation is going to be consumed pretty quickly, using this frosting is not a problem. It will be okay for a few hours if the temperature where it's being held isn't too warm. I frosted a cupcake to test out what would happen to the frosting overnight and the frosting started to lose cohesion and get oily. The cake in the above photo was in the refrigerator overnight and looked just as good the next day. If you go that route, just take the cake out 30 minutes to an hour before serving so it can soften up a bit. If you have stored cakes in the refrigerator before, you know what I mean.
For Chocolate Russian Buttercream, just add 1/2 to 1 cup of cocoa and whip it with a mixer until well combined.
Yes, this recipe is a winner. It's a good idea to keep some sweetened condensed milk in your pantry so you can make this recipe instead of relying on one that is commercially made. The flavor is miles above the canned stuff!
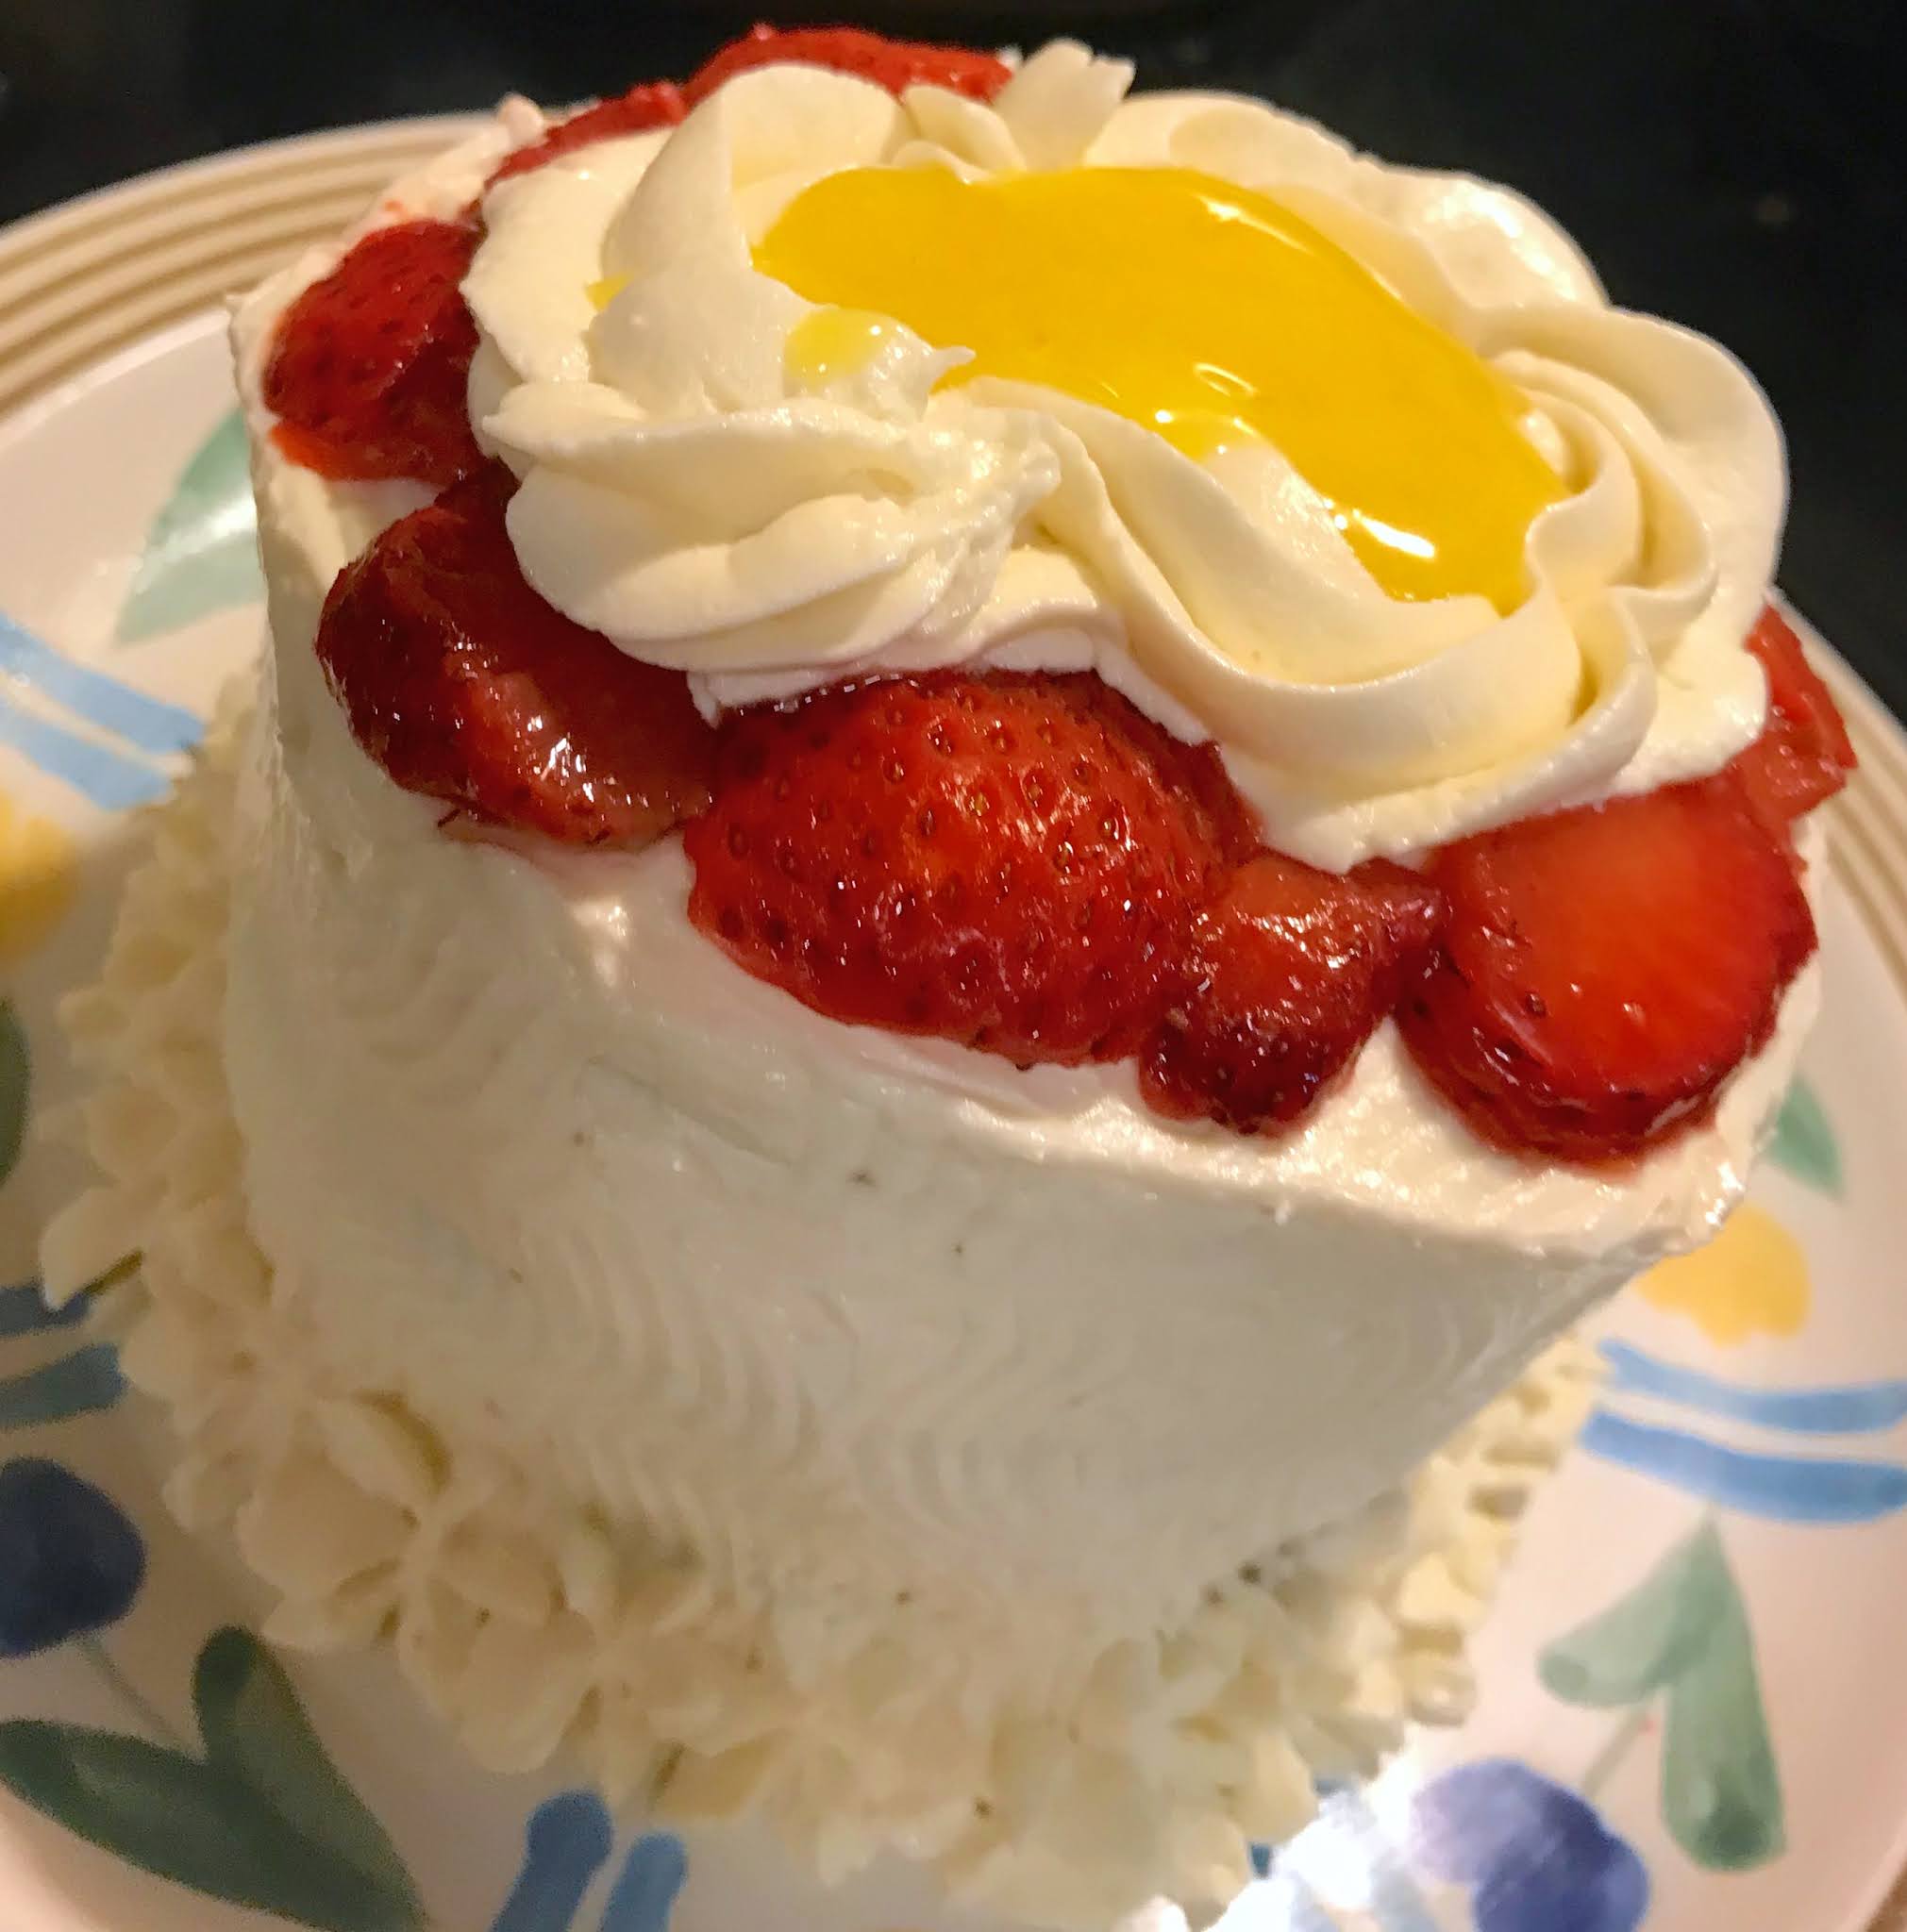 |
| Vanilla Sponge Cake with Russian Buttercream, Macerated Strawberries, and Lemon Curd |
I love food. I love talking about it, creating wonderful dishes, and feeding people. The kitchen is my happy place and I love conducting experiments there, whether the dishes are savory or sweet. I like to blog about it when I have time, in hopes that I might help or inspire others. I don't consider myself a food snob, though I am picky about how certain meals are prepared. I'm happy with a simple meal at home, like beans and cornbread, as well as a meal in a fine-dining establishment (and everything in between). I hope you enjoy my blog and leave me some feedback if you have time.
 |
| Low Sugar Peanut Butter Cookies |
What the Fork?
Who loves peanut butter cookies?
They were never my favorite when I was growing up. I may have eaten them if they were around, but I could take them or leave them. They just didn't ring my bell. The school used to serve them to us as one of the dessert items. They were always dry & hard. I did like my Mom and grandma's versions better, but they still weren't that thrilling to me.
Of course they were always easy to spot on a buffet table, because everyone marked them with a fork. Usually crosshatch, but not always. There are different lines of thought about why that practice started. Some say it was to make it easier to identify the cookie. Well, it's peanut butter. The smell alone is the identifier. It's not like oatmeal chocolate chip cookies that you bite into, only to find you were betrayed because they are full of raisins.
Some feel that they were marked simply as a way to press the cookie down so it baked evenly. (Yeah, I could buy that, but it really depends on the recipe.) Why not just use the bottom of a glass to press them down? A fork seems like a goofy way to press cookie dough down when there are other ways that are more efficient.
Another line of thought is that they were marked so anyone allergic to peanuts would know. Maybe, but I wonder if peanut allergies were at the same level as they are now. For instance: Many schools don't serve them anymore, or allow them to be carried into school because peanut allergies are so prevalent now.
My line of thought is this: The person who first made the marks did it for decoration only, so it would resemble the ridges on a peanut shell.
I tracked down the first published recipe that included the fork treatment in the instructions. It was a cookbook named "Pillsbury's Balanced Recipes," in a recipe for "Peanut Butter Balls." There was also a recipe for peanut butter drop cookies in the same cookbook. You can find this cookbook for sale on vintage book websites or auction sites. The price is usually out of this world, though, because the book cover is a nifty silver tin, and it has binder rings so the recipes can be removed for ease of use. I found pictures on Reddit of pages from the cookbook, but I didn't want to use those because they aren't mine. If you use a search phrase and mention the cookbook, you can view the images too.
Who Invented Peanut Butter?
According to Smithsonian Magazine, the Incas were the first people to grind peanuts for use. The Incas were known as "master agriculturists" and many of the crops grown during their era are still a part of the Peruvian diet today.
In the United States, peanut butter made its first appearance in the late 1800s. In 1895, John Harvey Kellogg filed a patent for boiling and grinding nuts into a paste. Peanuts weren't specified in that patent, he used other nuts too. Nonetheless, peanut butter was born.
Kellogg...sounds familiar, eh? Well, if you thought about the cereal, you are correct. He was a "cereal pioneer." He was also a doctor and nutritionist, and in charge of a sanitarium. He wanted to create foods that were easier for his patients to eat, and peanut and other nut butters helped resolve that issue. Before the end of the century, one of his employees invented a machine to roast and grind peanuts, which surely made consuming peanut butter a much more pleasant experience for his patients.
So peanut butter was around, but not very well known right away. In 1896, Good Housekeeping magazine published an article that encouraged housewives to grind their own peanuts using a meat grinder. This may have been at the behest of Mr. Kellogg, who preferred a plant-based diet and viewed meat as an aphrodisiac. (That's speculation on my part, but the article was so close in time to his invention, that it seems likely.)
The first recipe for peanut butter cookies was published in 1902 in a cookbook called "Mrs. Rorer's New Cook Book." Her recipe didn't call for using a fork to press the cookies down before baking because in her recipe, the dough was rolled out and cut into squares. I suspect she was influenced by the Good Housekeeping article though, because directly above the cookie recipe are instructions for grinding peanuts. (Her cookbook is in the public domain, and you can view it here. Alternatively, you can purchase a copy of it from an online merchant's site, but the prices are a little high, so...nah! Digital all the way!)
Peanut butter was formally introduced to the public in 1904 at the St. Louis World's Fair.
George Washington Carver
George Washington Carver was an amazing man. He was a scientist, inventor, and teacher. He had a master's degree in agricultural science and spent a lot of time helping farmers with his experiments. Read more about this extraordinary man here.
Mr. Carver also did more for peanuts than any other American. He published bulletins on many subjects when he was alive, and I ran across one of them regarding peanuts. In this bulletin, he was promoting the use of peanuts and there are 105 recipes for peanuts! I am definitely going to try some of these recipes. Check out this bulletin. He was very thorough with his research and developed 300 ways to use peanuts! Ultimately, he became known as "The Father of the Peanut Industry."
 |
| George Washington Carver (Public Domain Photo) |
I love food. I love talking about it, creating wonderful dishes, and feeding people. The kitchen is my happy place and I love conducting experiments there, whether the dishes are savory or sweet. I like to blog about it when I have time, in hopes that I might help or inspire others. I don't consider myself a food snob, though I am picky about how certain meals are prepared. I'm happy with a simple meal at home, like beans and cornbread, as well as a meal in a fine-dining establishment (and everything in between). I hope you enjoy my blog and leave me some feedback if you have time.