Showing posts with label desserts. Show all posts

Friday, October 13, 2023

Recipe: Need an Emergency Pie? Try This Easy Cherry- Cream Cheese Pie


This one was just a "throw-together" pie that turned out really, really well. I have to post about it so I don't forget. 

It all started with a pre-made pie shell that I wanted to use before it was unusable. I like to make my own pie dough & I don't buy pie shells very often, but I was curious about the texture & flavor. It was a Pillsbury frozen crust. (I am always leery of Pillsbury products because some of their products have an unpleasant aftertaste.) Since these were in the freezer section, I thought it might differ from the refrigerated version. They seem to be pretty popular. I remember when Pet was the king of pie shells in this area, but I guess they got out of the pie shell game, or they just don't ship to our area anymore. 

I've never been a fan of canned fruit for pies because most of them have an obscene, insane amount of sugar. So I'm either going to use fresh fruit, frozen, or dehydrated. This time it was frozen cherries. There was one package in the freezer, the organic kind. It was only 10 ounces. 

I thought, well, I can always just make a galette with the filling, but it was such a small amount, I changed my mind. I didn't want to add any other kind of fruit, so I decided to use an 8 ounce package of cream cheese that was also in the freezer. Posipka was the finishing touch. I had some of that in the freezer as well, but it's something you can throw together in minutes, so it's not a big deal if you don't have any on hand. 

Ingredients: 

Homemade pie dough for one 8-9 inch pie, or a store-bought pie shell.  (I'm sure it would be great with a graham cracker or cookie crust too.)

One 10 oz. bag of organic frozen cherries

One 8 oz. pkg. of cream cheese

1/2 c granulated sugar (I used Zulka Mexican Sugar)

1 egg

1 tsp. vanilla (I used vanilla paste for this recipe, but regular vanilla is fine)

1 Tbsp. cornstarch

Posipka at will! (you'll need sugar, flour, and butter for this)

Method

For the cherries:

Dump cherries in a saucepan, turn the heat on low. When they start to release juice, turn the heat up to medium. Once they have softened, you can mash them with a potato masher as much or as little as you please. 

Add 1/4 c of sugar to the cherries. Stir well. 

Mix the cornstarch with a little water (1/8 c or so) to make a slurry, then pull the cherries off the burner and add the slurry. Stir until combined, then put it back on the burner and cook for 2 to 3 minutes. Remove from burner, cover, and set aside to cool. It doesn't have to be completely cool before adding to the pie, but you don't want it too warm either. 

For the cream cheese:

Put the cream cheese in a microwave-safe bowl and microwave until softened (30 to 60 seconds - do it in increments). You can do this in a pan on the stove if you don't like using, or don't have, a microwave oven. Once is it softened, (it's okay if it's a little "soupy," don't worry about it. Just try to keep soupy to a minimum). Add 1/4 c sugar, mix well. Let it cool slightly (pop it in the fridge for 10 minutes or so). It can be warm, but not too warm, so your egg won't curdle. After cooling, add the vanilla, mix well. Scramble the egg and add to mixture. Mix until well combined. 

Set oven temp to 350ΒΊF. 

Prepare your pie shell, (or remove from package if store bought). πŸ˜„

Put the cream cheese mixture in the pie shell, use a rubber spatula, if you have one, to get every bit of it out of the bowl. Spread evenly on bottom of shell. Place in fridge while you prepare your posipka. If you want, you can top with the cherry mixture and either swirl it in, or leave it as is. Just make sure all of the cream cheese is covered if you opt not to swirl. 

For the posipka: 

I just "play it by ear" when I make posipka. Some people melt the butter, but it's better to leave it solid, IMO. That's how my Czech grandma did it too - solid. You have to gauge it depending on the recipe, but if you make too much, don't worry. It freezes nicely for your next dessert. 

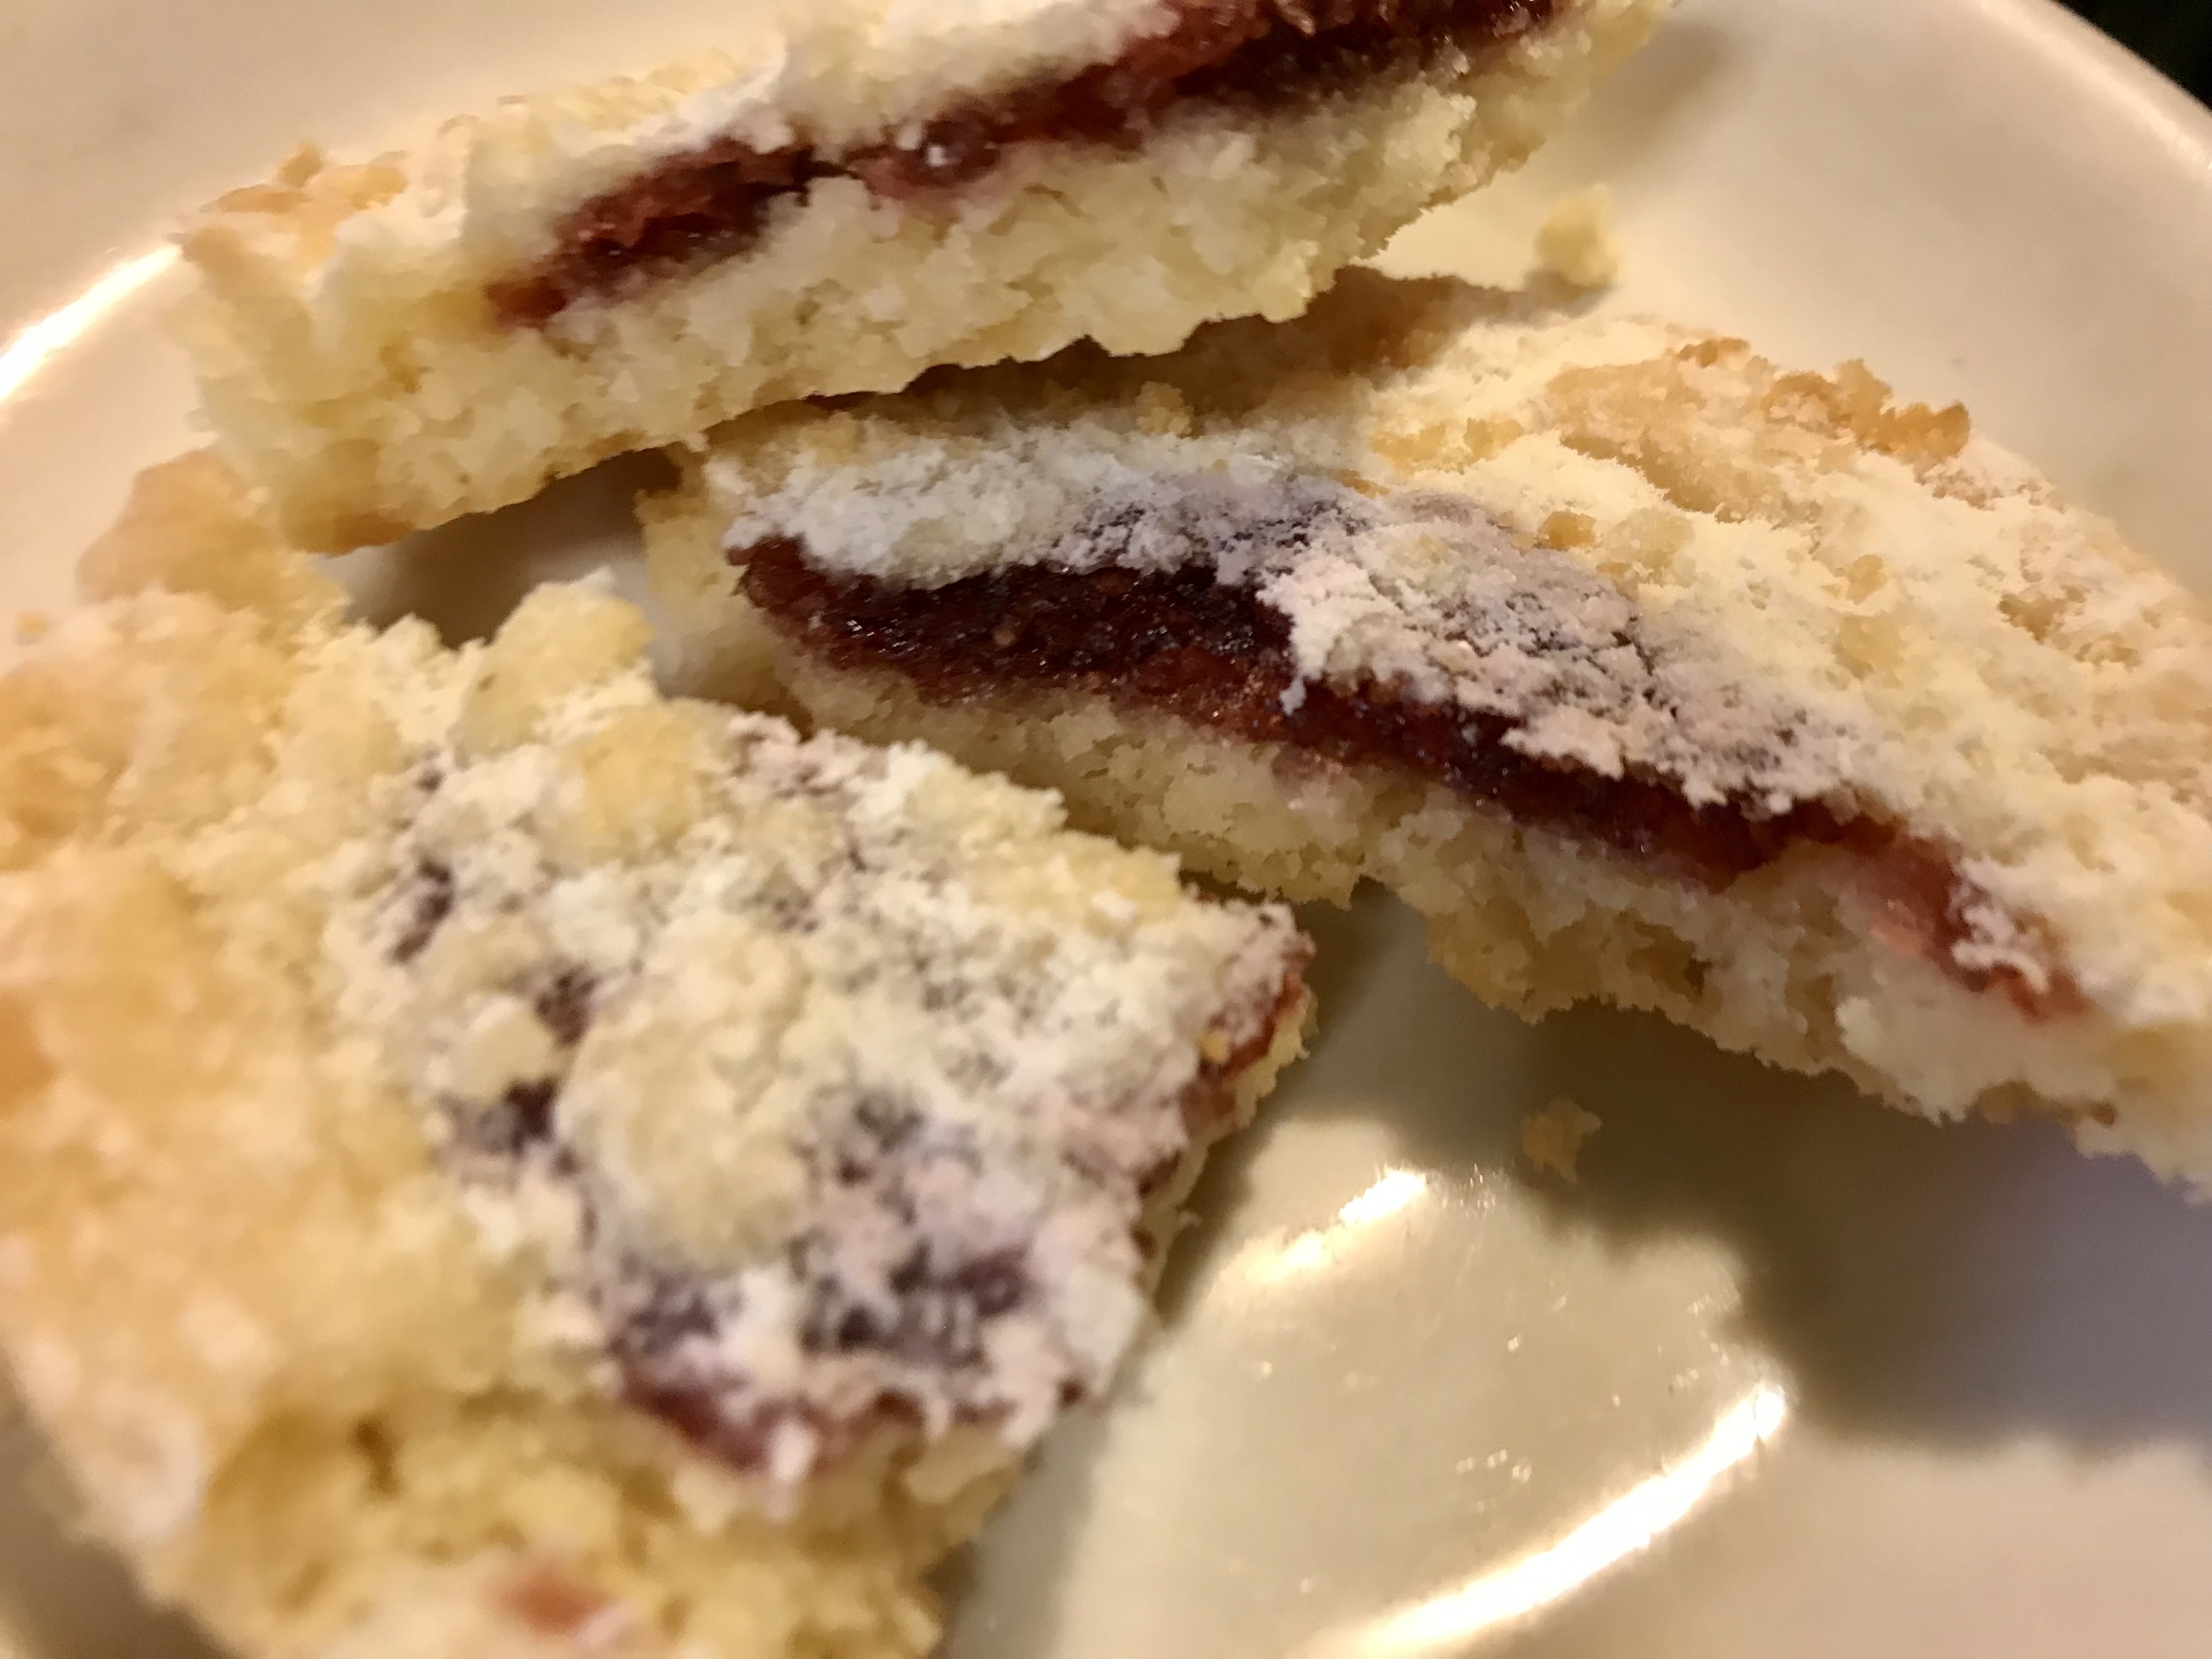
I start with 2 Tbsps. butter, straight from the fridge. Add 2 Tbsps. flour & 2 Tbsps. granulated sugar. Then just pretend you are making pie dough and use a manual handheld pastry blender, or a fork. Mash until crumbly. You'll have to add additional flour as needed to get it to the right crumbly state. Sometimes I also end up adding a little more sugar. It's really a personal preference - some people like to make their posipka sweeter, some don't. I like a good balance. Just eyeball the posipka on the pie in the pic, that's what you want it to look like. Crumbles of all different sizes. 

After making the posipka, take out the pie. Add the cherries if you haven't already. Then sprinkle with posipka. Fire at will...or rather...posipka at will! 

Bake for 30-40 minutes, but check at the 30 mark. The dough should look golden by then, your cream cheese will look puffy, and you can test with a knife or toothpick to make sure it is done. Your dough should be okay at that temp without covering the edges, but if your oven runs hot, go ahead and use protection.  

Let it cool on the counter for a while, then put it in the fridge to cool completely. 

It might sound like it takes a long time to prep, but it doesn't. Once the cherries are done, the rest of the prep takes less than 10 minutes (if you have already prepared the pie dough, or have a purchased pie shell).

It's a tasty, quick dessert if you need one for a party or potluck. 

Enjoy!

P.S.) If any part of the instructions are unclear or seem goofy, just let me know and I'll clarify. I do proofread before posting, but sometimes I miss things. 😁

Thursday, September 21, 2023

Kitchen Tip: Did Your Cake Fall? Here's One Solution


Strawberry "Invisible Trifle" Cake πŸ˜†


Just as Frankenfurter said, lol

It was oven betrayal that caused this fall. The lower oven element decided to take a powder. When I checked the cake at 5 minutes left, the batter was not baked enough. So I jiggled the element a bit with a wooden spoon and reset the oven. 

I set the timer for 5 more minutes, but I thought it would take longer. Nope. When I checked, the top was getting too brown & it had fallen in the middle. Not all the way, just about half. 

So it wasn't bad. Too brown, but that could be trimmed. I thought about just doing that and moving on. This was supposed to be the vehicle for some strawberry filling I made from H.E.B. strawberries that had frozen in the fridge. Because I didn't want to take the time and make kolache. 

Well...why not have a little fun then? I cut it in half and used a "whiskey on the rocks" glass to cut the middle out. It was the perfect size. 

I used the strawberry filling to fill the outer circle. In the middle I decided to make a strawberry & whipped cream trifle. By the time I finished with the whipped cream on the outside, you couldn't tell it suffered any damage. 

Yes, I know, I could have made "cake pops." But I don't like those at all. Smoosh cake & frosting into a ball. It's like some kind of "pre-chewed" Charlie's food. I'm sure the smooshing part is a lot of fun though, as long as you're wearing gloves. πŸ˜† 

I did end up getting more fresh organic strawberries to chop up and use in the "trifle." I didn't go nuts and decorate with sliced strawberries on the side since we were enjoying this at home, but if I had to take it to a potluck or something, I would have. I would have also frosted it differently too. More polished & professional. Ready for the "runway." πŸ˜†

This next photo below is what it looked like after a couple of slices were removed. Not "runway material" at all, but it sure was tasty. So it's just another option to try if you are not a "cake ball" fan. Mini tortes would have been another good option. Maybe next time. 😁

So there you have it. Strawberry Invisible Trifle Cake. I'm sure it has been done thousands of times by many bakers, but for anyone who didn't know about it, now you know. 

Day 1: Yeah, looks like a xenomorph came out of there. 
                                                                                 πŸ˜‚


Day 2: Even tastier than Day 1. 
Still looks like a prop in a Halloween Horror House though. 

πŸ˜‚

The filling was absolutely excellent. A big thank you H.E.B. for such beautiful strawberry offerings! I was determined to use them even though the fridge froze them. (It was a whole pint, so yeah, didn't want them to go to waste.) 

I just tossed them in a saucepan, and added...maybe a teaspoon & a half of sugar. It could have been 2. They didn't need much. We want to taste the strawberries and not the sugar, no? 

They stewed in their own juices. No extra water was used, and no cornstarch for thickening. They thickened enough when they cooled down. Not runny at all. Just start them off on low heat at first, until they start to release juice, then turn it up and let them simmer for a while. Mashed with a potato masher (the one that's good for mashing beans, not the waffle kind.) I'll take a pic of it and add it later. 

The recipe for the sponge: I'll have to post it here. It was lemony, and a perfect complement for the strawberries & cream, though a vanilla version would be good as well. 

Homemade whipped cream. Don't be afraid! It's not a big deal. I rarely even measure it. Just dump about a cup or so in a bowl (double if you need extra), sprinkle in a little granulated sugar (maybe 1/2 Tbsp. or a whole Tbsp., depending on your preference), dump some vanilla in, (if using), and go to town!

But you don't have to go nuts with the mixer right away. I learned from some experts that it is best to start off slowly, then gradually increase the speed of the mixer. It does hold its shape better if you use that method, if you plan on piping. 

I'll be making this one again. It was delicious. 

Any questions? Just drop me a line. 

Tuesday, September 5, 2023

Product Review: Mindy Lu's Pies


I have seen these around from time to time, but I was always hesitant to try them because I was afraid they were too sweet. 

Finally took the plunge, and guess what? They are not too sweet. They are just right. 

If you are addicted to sugary snacks, pass these up and leave them for the rest of us. You are looking for the pies that have filling that is cloyingly sweet, and are also drenched with a sugary coating. 

Mindy Lu's pies have just the right amount of sweetener, and the crust on these pocket pies is tender and flaky. 

Blueberry

I heard they are even better if you pop them in a toaster oven, but I never get that far. I have to consume immediately. 

Are they healthy? No. But they are fine for a treat once in a while. If you don't mind consuming about 340 calories or so in one sitting, you can always eat more. πŸ˜†

The calorie count varies slightly per pie. My last one was blueberry, and those are 340 calories each. 

These are so much better than the ones that seemed so popular many years ago. The crust was a lot harder and thicker on the pies in Long Ago Land, and they were far too sweet, as mentioned above. 

Give these a try if you stumble across them. If you're in Arlington Texas, you can go directly to Mindy Lu's pies and place an order. They also have online ordering, but it is suspended for the moment until the weather gets cooler here. Otherwise, you may find them in select grocery stores & gas station convenience stores.

Link: Mindy Lu's Pies


Sunday, July 31, 2022

Product Review: Costco's Kirkland Raspberry Crumble Cookies


Ah, there it is...the famous Raspberry Crumble Cookie from Costco's bakery. I have read the rave reviews about this cookie that are frequently expressed in a Costco Facebook group. We finally picked some up to try them out. $11.99 for one dozen at our usual Costco. They're a pretty good size, maybe 3" diameter or so. 

These cookies have a shortbread base and are topped with raspberry jam/preserves and posipka (a.k.a. streusel or crumble topping). The finishing touch is a dusting of powdered sugar. 

They are very good. It would be easy to eat 3 or 4 in a sitting. They are approximately 340 calories each though, so exercise some restraint! 

There's not a lot to complain about here. Well, the price could be a little lower. As far as flavor, as I mentioned above, they are very good. But...there's a slight aftertaste that isn't pleasant. It's not strong enough to deter me from eating them, but it's there. It might be because of the palm oil. To me the aftertaste is reminiscent of cookies I've eaten in the past where lard was used in the recipe. But it was probably the palm oil. Maybe it is not a common occurrence. It might have been limited to the batch we had. 

As far as the palm oil goes, we normally avoid products that use palm oil as much as possible. Thankfully, Costco is a member of RSPO - (Roundtable on Sustainable Palm Oil). Click on the link for more info. 

The only other thing that I would add would be more raspberry filling! The cookies would definitely be better with a bit more of that! 

Just FYI: I've seen some people suggest heating the cookie for a few minutes in oven or microwave. "They're even better that way!" - Costco fans have claimed. We have exactly one cookie left, so I might have to try that tip out. 

Below are two more photos, just to show you what the cookie is like inside.


Saturday, August 14, 2021

Cinnamon Roll Adventures


I finally got a chance to make some cinnamon rolls again. This time, I made them using the recipe from King Arthur Flour's website. The recipe I used included the tangzhong method, in which part of the flour is cooked with milk or water (or both) on the stovetop until it thickens. This method results in softer breads, and helps them to stay fresh a little longer than other methods. I love to use this method for rolls and loaves of bread, so it was no issue to use it for cinnamon rolls. 

The rolls were very good. The dough was very easy to work with after mixing, and especially after the first rise. The only thing I wasn't happy about was the cinnamon, so I embarked on a cinnamon hunt to find some cinnamon that was just a little more potent. I never gave it a lot of thought before because I don't use it that often. Besides cinnamon rolls, I use it in oatmeal once in a while, spice cake, and of course in November for pumpkin pie. 

So I gave myself a crash course on cinnamon. I'll have to do a post on cinnamon in the future because I am supposed to be reporting on rolls here. πŸ˜† Since I made these rolls the other day, I have purchased Ceylon cinnamon and Saigon cinnamon for future batches, (which will be in the near future for sure). 

The next batch I'm planning will be made using my grandmother's kolache dough recipe. She used her kolache dough for cinnamon rolls too. Her cinnamon rolls totally rocked! I haven't used her recipe in a while. Last year I made a Keto version of cinnamon rolls and a Swedish version. I think cinnamon rolls should be made more than twice a year, and I am going to get into the habit of making them more often. 

I do recommend the King Arthur recipe. Try it out when you get a chance. Don't be intimidated with the tangzong method. It was weird for me when I first started using it, because I had only cooked flour when making choux pastry in the past. I was just used to using standard bread recipes, so it took a little adapting. I don't use it for all breads, but I do use it pretty frequently now. Click here for the King Arthur cinnamon roll recipe. 

The only thing I changed in the King Arthur recipe was the icing. I didn't use theirs. I made one with cream cheese using 1 stick of butter, 1 brick of cream cheese, 1 tsp. vanilla, 2 cups of powdered sugar, 1 tsp. of cinnamon, and just a bit of milk or cream, (depending on what thickness you prefer). 

Oh! I almost forgot to mention: KA's recipe doesn't have any sugar. I did add 2 tsps. of sugar, but only to feed the yeast and allow it to bloom before I mixed the dough. 

The cream cheese icing I mentioned above works really well with the KA recipe. The dough isn't sweet, and the brown sugar used for the filling along with the cream cheese icing I mentioned above gave the rolls a very nice balance. They just needed more cinnamon. 😁

Friday, July 30, 2021

Waking Up to Excitement with Tiramisu Cookies


I woke up and checked email this morning and found that my recipe for Tiramisu Cookies was chosen to be featured on...wait for it...Delishably.com! 

In the interest of taste buds everywhere, I will get back in the "laboratory" as soon as possible for more sweet experiments. 

This is happening at a time when Texas temps are getting higher, I'm still fighting to catch up with yard work thanks to the unusual rain amounts we experienced last month, and my workload for process serving is increasing by the day. *taking a deep breath*

That's just daytime hours though. There's plenty of time in the wee hours to conduct experiments in the lab! 

Here is a link to the full recipe for my version of Tiramisu Cookies: 


If you make this recipe, drop me a line either here or there to let me know how you like it. If you need any help or troubleshooting with the recipe, let me know! I really need to make a picture tutorial for this one as well as the Bienenstich Cookies. That's on the list too, so keep an eye on this space. I'll get there! 

Tuesday, July 20, 2021

An Exciting Moment For My Bienenstich Cookie Recipe


I was out working one of my jobs when I got some exciting news about my Bienenstich Cookie recipe. I checked my email (while I was parked) and saw that I had an email which informed me that my recipe is being featured at delishably.com. I almost fell out of the car! 

I am still dancing around! 

Click the recipe title below to view it there. I did post about it here, but I didn't post the full recipe here. I posted the full recipe on my hub at Hubpages (because they have such nice tools there to make it easier to post recipes). I wasn't trying to get featured on anything, I was just sharing my recipe. So.....WOW!!!!! What a nice surprise!!!!!!! There goes that "Kitchen Magic" again!!! 

On top of that, before I left, I had a discussion with my Mom about 2 new ideas I had for experiments. I have quite a list, so I'll be dedicating a lot more time to it now. 

They changed the title a bit, and did a few other minor edits, but that's just fine with me! 

So, without further ado, here is the link: 

Bienenstich Cookies: A Beloved Cake Transformed

If you try my recipe, please let me know your thoughts about it, or if you need help with anything. 

Now it is time for me to get back to the lab to conduct more sweet experiments!

Happy Eating! 


Thursday, July 15, 2021

Stovetop Chocolate Steam Cake Recipe Review


Chocolate Steam Cake

You must try this cake recipe! It's great for those days when you are craving a piece of cake, but don't want a big hassle of dragging out all of your baking tools, and great for warmer weather when you don't want to heat up the kitchen by using your oven. And if you're thinking, "but I could just buy a piece of cake at the deli..." Pfffft!!! Forget about that over-priced nonsense that's overloaded with sugar! 

You don't even need to break out your mixer for this cake if you don't want to. A handheld balloon whisk works fine. 

What Should I Use For A Steamer?

I used an 8 quart stockpot with a reinforced bottom, and we just happened to have a round metal baking rack that fits in the bottom of this pot. We also have a lid that has a built-in steam vent. If you don't have a lid like that, you'll need to loosely cover your stockpot with foil. If you don't have a baking rake that will fit, you can use several balls of wadded up foil, or save up some tuna cans (or cans similar in size to tuna cans, with both ends removed, if possible), and use those instead. Canning rings are too short. You need about 1 1/2-2 inches of water in the bottom of your steaming pot. You might be able to get away with using a shorter pot (such as a 4 quart pot). Next time I make one I'll use one of those and report the results here. 

Here are the other tools that come in handy: 

2 mixing bowls

Handheld whisk

Spatula (for bowl scraping - not mandatory, but I'm picky, so I use one)

Kitchen tongs with silicone ends, 2 pairs, if you have them (for easy removal)*

8-9" cake pan or springform pan

Sifter (not mandatory but it does help)

Measuring cups (for liquid & dry measure)

Measuring spoons

Small bowl for egg inspection & egg beating (see "Breaking Bad With Eggs")

The Recipe

1 cup A/P flour

1/3 cup cocoa powder

1 tsp. baking powder

1 tsp. baking soda

3/4 to 1 cup sugar

1/2 tsp. salt

2 eggs (room temperature)

1/4 cooking oil (canola, vegetable, light olive oil, or coconut oil)

1/2 milk

1/2 tsp. vanilla

1/4 tsp. instant coffee (optional) 

Spray release/oil spray (with or without flour)

Water for steaming (as needed)

Instructions

1. Prepare your steamer & start heating the water on high heat.

2. Coat inside of cake pan or springform pan with spray release.** 

3. Sift all dry ingredients into a mixing bowl, and whisk them until well combined. 

4. Mix milk, oil, and vanilla in a separate bowl.

5. Beat eggs & add to milk/oil/vanilla mixture. Mix well. 

6. Add wet ingredients to dry ingredients and mix well. 

7. Pour into cake pan. 

8. Check the water level in the pan. Add more (hot tap water) if needed. Water should be at least at a simmer at this point. 

9. Carefully lower cake pan into pot using tongs. 

10. Cover & steam on medium to high heat for 25-30 minutes. You can check your water level about halfway through the cooking time & add more if needed. I haven't yet had a problem with the water completely evaporating. It might be because we have that lid with the steam vent. I'll use foil next time and report the results here. 

11. Test the cake in the usual manner, (toothpick, slim knife, bamboo skewer), if it comes out clean, it's time to remove the cake. Also note if the cake has pulled away from the sides, that's another "tell." 

12. Remove the cake very carefully using the tongs. Put it on a cake rack to cool for about 10 minutes before removing from pan. 

13. Frost with your favorite frosting or dust with powdered sugar. It doesn't really need anything extra at all. It's very good just as it is. 

Just One More Thing (or two)

*About those tongs - I only had one pair on hand, so I used a long serving spoon as a wedge on one side of the pan, and the tongs on the other. If you don't have tongs at all, carefully wedge it out using 2 long serving spoons, and grab the edge with a pot holder when it gets high enough to grab. (I'm thinking there might be a 3rd option for a safe removal. I will try it next time and report the results here.)

**If you decide to use a springform pan, cover the bottom with foil, just as you would if you were making a cheesecake in the oven. 

The cake top of the cake will look a little strange because some water drops will be falling on it during steaming. It's just fine. Unless the top of the cake looks VERY wet, then you might need to make some adjustments next time so your foil vents the steam a little better. 

Use your favorite cocoa. I used Hershey's Special Dark cocoa in this recipe. 

Let me know what you think about this cake. Any issues? Just leave me a message in the comment section. 

Here's a pic from an evening when I got a little fancy and frosted the cake with whipped chocolate-cream cheese ganache and golden sugar crystals. 

Sunday, July 11, 2021

Russian Buttercream - Three Ingredients For A Quick Fix

Vanilla Sponge Cake with Russian Buttercream
Garnished with Macerated Strawberries & Strawberry Sauce

Russian Buttercream

One day I was looking through some recipes for Russian desserts. In the past I've made savory Russian dishes, but never dabbled enough in Russian desserts. It was time to remedy that situation. While I was looking, I stumbled across Russian Buttercream. 

What? Russian Buttercream? How did I not know about this? Three ingredients? Are you kidding me? 

Nope. Three Ingredients: Butter, sweetened condensed milk, and vanilla. That's it! 

That's all you need, and the recipe comes in handy when you are in a hurry and need a frosting ASAP! 

As luck would have it, I already had some 4-inch cakes on hand, because I had planned to make Strawberry Shortcakes. Well, that would still happen, but with Russian Buttercream instead of whipped cream. Yeah, I know, I wasn't making "traditional" strawberry shortcakes using a sweet biscuit base, but sometimes we like to switch things up. 

So I go to the food safe to find a can of sweetened condensed milk. We always have that stuff on hand. I rummage. I grab the flashlight so I can look in every corner on every shelf. What? How do we not have any? We always have it! 

Classic case of: "We always have that ingredient on hand when we don't need it, but when we need it we don't have it." It happens sometimes. No rush. Testing delayed for a few days.

The Recipe

Easy as pie! (Actually easier than pie, since making a pie requires more of a time commitment.) Grab 2 sticks of butter from the fridge and set them out until they soften. They should be a little firm, not to the point where they are the consistency of Pond's Cold Cream. (Do they even make that anymore? That might be a bad example.) Not to the consistency of mayo. They should be firm, but not mushy. 

Take out one can of sweetened condensed milk and have your vanilla on hand. 

When the butter is ready, beat it with a mixer on medium speed for 5 minutes. It should look considerably lighter. If you're using a stand mixer, use a spoon and coax the condensed milk into the bowl a little at a time while the mixer is still running. Alternatively, just add in small increments, stopping the mixer between each addition. You can do it 3 to 4 ounces at a time. Add vanilla in at any of those points. 

If your butter seems too soft or the mixture looks like it might be separating, just pop it in the fridge for a few minutes, then take it out and whip it some more. (I had to do that a couple of times because it was pretty warm in the kitchen when I made it.)

So easy. It has a good flavor and is not too sweet, and it has a silky mouth feel. You can pipe it and it will hold its shape, as seen in the photo above. If your hands are hot, work quickly or take breaks and pop the piping bag in the fridge for a few minutes. 

How Does It Hold Up?

If your sweet creation is going to be consumed pretty quickly, using this frosting is not a problem. It will be okay for a few hours if the temperature where it's being held isn't too warm. I frosted a cupcake to test out what would happen to the frosting overnight and the frosting started to lose cohesion and get oily. The cake in the above photo was in the refrigerator overnight and looked just as good the next day. If you go that route, just take the cake out 30 minutes to an hour before serving so it can soften up a bit. If you have stored cakes in the refrigerator before, you know what I mean. 

For Chocolate Russian Buttercream, just add 1/2 to 1 cup of cocoa and whip it with a mixer until well combined. 

Yes, this recipe is a winner. It's a good idea to keep some sweetened condensed milk in your pantry so you can make this recipe instead of relying on one that is commercially made. The flavor is miles above the canned stuff!

Vanilla Sponge Cake with Russian Buttercream,
Macerated Strawberries, and Lemon Curd

Friday, July 9, 2021

Tiramisu Cookies


I mentioned these in a previous post. The idea involving these beauties had been simmering on a back burner in my mind since at least last year. It was time to bring it out into the world. I had originally planned to make a sandwich cookie version, but I changed my mind, and I'm glad I did. 

The holdup for this experiment was time, but also indecision about what the base cookie should be. I had originally planned on a nice, fat, sugar cookie. Sure, I could have made batter for ladyfingers and used that, but...nah. I wanted a cookie that could be eaten by hand and not one that required eating utensils. With ladyfinger batter they would have simply been "Tiramisu Bites." 

There are other recipes out there, and I did review them, but none of those were what I had in mind. I wanted to get as close as possible to the real thing. Then the bell finally rang. Why not make a cream cheese cookie for the base? The ingredients for cream cheese cookies mimic the ingredients for "substitute mascarpone" anyway. So, hey! This could be IT! Would the cookies be sturdy enough for the base? That was the next question for which I needed an answer. 

I made the dough, chilled it so it wouldn't spread too much, and used the Norpro 1.5 Tbsps. scoop so they would be uniform in size. The resulting cookie was soft, but not too soft. I thought they would work. 

The next component was the "coffee liqueur." I obviously couldn't dip the cookies in that. It wouldn't work. So instead, I used Ghirardelli 60% Cacao Bittersweet Baking Chips to make a coffee-flavored ganache. I had espresso powder on hand because I purchased it some time ago, when I initially had the idea. I was going to simply use the powder alone at first, but the ganache seemed like a better idea. More "oomph." I added it to the cream but ended up adding more after the ganache was finished, because it needed more. It was fine. I just stirred it in and added a bit more cream. 

For the next component, I made a white chocolate ganache using rum & vanilla. The cookies were finished with a dusting of cocoa powder. 

The result? Success! The cookies exceeded my expectations. It was like biting into the real thing, "mouth feel" and all. The cream cheese cookies complimented the other elements perfectly. The mascarpone element had been worrying me, and I had wrangled with that for a while. I thought about cream cheese powder in the ganache, etc. But it was totally unnecessary. The right flavor was in the cookie base, and the rum in the white ganache covered nicely for the coffee liqueur. All of the right flavors were there, albeit in a different order. I was very happy with the results. I was able to share with some friends for a taste test and they loved them as well. 

I will be posting the full recipe and instructions for these soon. Now on to the next experiment! 

Tiramisu Cookies

Thursday, July 8, 2021

Bienenstich Cookies

Bienenstich

                Bienenstich (Bee Sting Cake)  is a lovely German pastry that you may have heard about or experienced. I suppose the proper title would be Bienenstich Kuchen, but if you look it up and scroll through recipes, it is more commonly referred to as simply "Bienenstich." It may be commonly referred to in Germany that way, I will have to ask someone. 

                I first learned of Bienenstich through a German friend when we were discussing cookies. If memory serves, that was in 2015. During that conversation, I was asked to make the cake. After listening to his description, I scoured the internet in search of the proper recipe. 

                The first try turned out quite well even though my filling wasn't quite thick enough. My friend deemed my version of the cake as "just as he remembered" back in Germany. That was a very high compliment for me, because if I can transport someone back in time through taste buds, it is a great accomplishment. 

                Since then, Bienenstich has been added to our list of holiday desserts at our home. I have made it many times, and everyone always enjoys it. It is a delightful combination of a yeast cake sponge, creamy filling, and an almond topping. Each element contains honey. 

                I have been intending to shrink the Bienenstich into smaller cakes that would serve one or two; or even making a bun-sized version, but I haven't had a lot of time for experimentation with those. I have also had the desire to make a "shelf-stable" version. (Bienenstich in its original form must stay under refrigeration.) 

Bienenstich Cookies

                So that brings me to the cookies. I was finally ready to make a version of Tiramisu in cookie form (after thinking about it off & on for over a year), and it suddenly occurred to me that I should do the same with Bienenstich.  It went from "thought to plate" very quickly...I believe it holds the record for that now, though I don't really keep tabs on the time things go from thought to plate (unless it's. savory dish, then the process is much faster). I have many pastry experiments to do and not enough time -- some have been in a holding pattern for months or years. This one entered the "queue" and was realized in less than 24 hours, so that's pretty good. 

                Without further ado, here they are: 

BienenstichplΓ€tzchen 
(Bee Sting Cookies)

                This was from the second batch. I was going to use a round tip for piping so they resemble the cake even more, but a star tip made them look much more appealing, in my opinion. I will be posting the recipe, but in a nutshell I used: a modified German honey cookie recipe for the base, honey ganache, and the standard topping for Bienenstich. I used Norpro #677 scoop (1.5 Tbsps.) for the cookie dough. I measured after they were done & as luck would have it, (really, it was Kitchen Magic, not luck 😁), I had some silicone cupcake molds on hand, which were just the right size to bake the topping, so the cookies were uniform in size from top to bottom. 

                The topping was not rock hard, you could still bite through it with no issues. You could simply make some almond brittle and crumble it over the cookies, but the presentation wouldn't be as nice, in my opinion.  

                As luck.....errr....I mean....Kitchen Magic would have it, my German friend was around to sample these and give them the German Seal of Approval. The experiment was a success! 


Sunday, July 4, 2021

What About Those Poppy Seeds?


Buchta

I grew up loving poppy seed. My Czech grandmother made kolache on a regular basis and we all clamored for the yummy poppy seed kolache. Sometimes she would make them open-face with posipka, but most often she enclosed them in the dough and made a poppy seed roll, and brushed them with butter when they came out of the oven. Once in a while she would glaze them with a simple glaze, but they didn't need any adornments. They were good just as they were. 

That wasn't the only time she used poppy seed. She also made buchta, which is a giant poppy seed roll. It was usually consumed in less than 24 hours. Lemon poppy seed cake was another favorite. She made that one in a bundt pan and glazed it with a lemon glaze. 

She was a purist about her poppy seed filling, and that rubbed off on me. No canned poppy seed. Never, never, never. No way, no how. She had a grinder and would grind it herself, and if we were around we'd help her grind it. Then she would make the filling on the stovetop. 

Sometimes we would try someone else's kolache, but they just couldn't hold a candle to Nan's, and most of the time they were filled with canned filling. The canned version was terrible--too sweet and tasted "canny." I could always tell when someone used the canned filling, and it was always a disappointment. That hasn't changed. There have been no improvements to the canned version after all these years. 

I'm very fortunate because I have her dedicated poppy seed grinder in my possession and that is what I use when I make poppy seed filling. 

Nan's poppy seed grinder,
made in...you guessed it,
Czechoslovakia! 

One thing I never had to worry about, (in fact, I never even heard about until years later), was the issue with the opiate content in poppy seeds. My grandfather and one of my uncles were both engineers with the Santa Fe railroad, and I remember that my uncle wouldn't eat poppy seed kolache unless he was on vacation. (Of course, the rest of us weren't bothered by this because there were more for us.) If he ate poppy seed, it might show up in a drug test. I don't really know when they started doing drug tests, but I don't think they  became standard until after my grandfather retired, or maybe shortly before then. I could be wrong, though, since it wasn't something I had to worry about personally. (Except for the extra kolache factor, that is.)  

I wanted to address it on this blog because I think some people might think that poppy seed will make you high if you eat enough of it. The poppy seeds themselves do contain a tiny bit of opium, but the majority comes from the sap in the pods which house the seeds. There is a chance that the poppy seeds will come in contact with the sap when they're harvested, but the poppy seeds that are available for purchase are normally washed before they go on the market. Still...traces of opiate might remain on the seeds after they're cleaned, and there's also the minute amount that the seeds themselves contain, but it is nothing to worry about.  

In the past, anyone who worked for a company that required regular blood tests could end up with a pink slip. Luckily, the federal government raised the acceptable level from .3 micrograms to 2 micrograms, so it's not really as much of an issue now. Just to be on the safe side though, if you have to have a drug test and have consumed anything with poppy seed, mention it to the tester. 

As far as getting high? No. You would have to consume an insane amount of poppy seeds for that to happen. Many pounds. You won't get a buzz from eating a poppy seed kolach. Well, maybe a sugar buzz, but that's it. 

There are some great articles in Google Scholar that discuss the opiate content of poppy seeds and information related to that if you are interested in learning more. 

I started thinking about poppy seeds because it is about time to make some kolache again. I don't make them nearly as often as my grandma did. I also like to make Mohnkuchen (German Poppy Seed Cake), which has a layer of poppy seed...a "mother lode" of a layer about an inch thick or more. (Still not enough to get a buzz, but the point of eating poppy seed is to enjoy the wonderful flavor. If you need a buzz, break out the wine. I don't know what wine pairs with poppy seed desserts though. You're on your own with that.) 

Thinking about that led me to thinking about some poppy seed loaded treats I made a few years ago. I brought them to a party, and believe it or not, there were leftovers. Leftovers? The poppy seed kolache and the Mohnkuchen were barely touched, but the other kolache were consumed. Hmm. It didn't occur to me at the time that no one wanted to eat the poppy seed because of the rumor of the buzz. It did hurt my feelings a bit. I spent a lot of time and love making the kolache and the Mohnkuchen, so when it was largely ignored, it hurt my heart. It was really my fault because I should have remembered that the attendees were people who eschewed alcohol, so I should have known. It didn't cross my mind though, because I never viewed poppy seeds as drugs or thought about them in that way at all, except for my uncle's drug tests. But there was a bright side. Leftovers! More for the true poppy seed kolache hounds. 

Here is a pic of a Mohnkuchen at a different party. This Mohnkuchen was consumed. 


So rest easy, Poppy Seed Lovers. You can enjoy your favorite poppy seed treats without fear. Be sure to hit me up for all your poppy seed needs, if you're local. Here is a fancier version of poppy seed kolache for your viewing pleasure:

Poppy Seed Kolache Deluxe

Tuesday, June 8, 2021

French Pastry Update

Photo Courtesy of demi, CC BY 2.0 via Wikimedia Commons

A Toast to Success! 

I have decided to postpone any further testing for the French Pastry experiment, and will instead focus on presentation. Yesterday when I opened the storage container with the remainder of the experiment, I was immediately alerted by the enticing aroma of French Pastry and transported back in time. It was as if I had an original French Pastry in my hand and had just opened the package. 

So, to test this out, I had to try another piece. It was stellar! I wasn't even thinking about "cure time" for the pastries, but that is exactly what they needed. I am over the moon about this. I hope it will bring others joy too, and soothe the palates of those who adored these sweet treats as much as I did. 

I'll post the exact recipe I used for each element in a future post, as well as the method & equipment I used. This is IT! My taste buds never fail me (except when they are knocked off the grid on occasion when I get a cold or flu). 

This is fabulous news for French Pastry lovers! I know they are out there because I have found posts lamenting the fact that they are gone and sadness because no one can find a decent recipe. 

I'm hoping to have some time this weekend to work on presentation. I wish I could email samples of these so people could try them. 

Wouldn't it be funny if Bimbo took the old recipe out of the "Mrs. Baird's Vault" and started churning them out all of a sudden? That would be pretty hilarious. πŸ˜‚

On another note, there is at least one other food item I would love to conquer. Enchiritos. No, not the ones they put back on in recent years, (and I don't know if they are even still on the menu because I never go to Taco Bell anymore). I'm talking about the original Enchiritos from way back. They had a hybrid tortilla. Then they took it off the menu, and years later, when they brought it back, they used a boring, crappy flour tortilla. So that was a disappointment. Anyway,  the rest of the Enchirito ingredients aren't hard to emulate, but that hybrid tortilla...well, that's the holdup. But that is for another day. Today we enjoy French Pastry and celebrate a success! 

Photo Courtesy of Jackie RGarcia, CC BY-SA 4.0, via Wikimedia Commons

Monday, June 7, 2021

Recreating Mrs. Baird's French Pastry - Who Remembers This Delightful Snack Cake?

 I certainly remember. This is a discontinued dessert that still haunts my dreams sometimes. I consume it in the dreams, and I can taste it. Then I wake up and curse at Mrs. Baird's for discontinuing it. 

I remember when I used to ride my bike to the small convenience store we had in town, (one of the only ones, if not THE only one at that time), to buy a French Pastry and a comic book. I didn't do it every day, but I did do it pretty frequently. 

My grandma even attempted a recreation before. She knew how much I liked them. Her version was very good, but not the same.  

I still remember when I bought the last one. 1990. I was living in Houston at the time and not enjoying the city. I had no idea I'd be buying the last French Pastry I would ever buy. I would have bought a few more to enjoy, had I known. 

Mrs. Baird's discontinued the French Pastry long before Bimbo bought the company. I don't know what the reason was, but I used to bug the bread man about the recipe when he brought deliveries to the store where I was employed for a while. I even wrote the company years back, but no dice. 

Here is a pic of the original French Pastry. It was the only pic I could find on the internet. It is a little grainy, but it is all I could find after using many different key words & search strings. If you have a better pic, let me know, or please share it in the comments. 


Mrs. Baird's French Pastry

I have been trying to find time to experiment with recipes to recreate this fabulous snack cake. Yes, I can "throw down" and make an "adult" version with real cream, extra layers, and fancy new-gaws, but I'm looking for the authentic Mrs. Baird's French Pastry flavor. So I finally took the plunge, after hemming and hawing about it for some time. 

My experiment turned out to be VERY close to the right flavor. I believe I can nail it with just a bit more tweaking. Once I get that down,  I'll work on the aesthetics. The ones I constructed can be politely labeled as "rustic." πŸ˜‚ If I had the nifty machine with a conveyer belt to run the things through a chocolate waterfall...hey, no problems then! But I don't, so I'm working with what I have. I'm posting my version below with different sizes and shapes. Go ahead and laugh. I did. πŸ˜‚


Chocolate Coating: Too Thick!!!

For this one I simply spread the chocolate coating to harden 
on parchment paper and then broke it into pieces. It's a good 
version because the chocolate coating is thin.


Round version with crumbled chocolate & nuts


This round version has a "chocolate cap." It wilted a bit
overnight so it looked a little more authentic this morning.


The Baird's version was about 4" in diameter & covered with a chocolate "shell" topped with chopped pecans. I want to get as close to that as possible, not just the flavor, but the right texture. Biting into a French Pastry was a delight as well, with the chocolate coating crumbling into the creme as you took a big bite. I will probably end up just piping the tempered chocolate on & then adding the nuts. I didn't hollow the cakes either. I might do that next time. They work pretty well as-is. The closest to correct was actually the rectangular version above with the crumbled chocolate & nuts. It had the right balance of creme, nuts, coating, and cake. 

The "creme" filling was spot on. The coating is just a shade too sweet...I will have to use a different brand of chocolate for that. The base would benefit from a little less sugar too. The texture of the base was about right. It was "Devil's Food Cake." I always thought they used devil's food cake for the base, but I'm planning to try a couple of other versions for the base that use the foaming method. (It needs to be light, but not too light.) Devil's Food Cake might be the ultimate winner in the end. We shall see. I just have to make sure. 

It ended up being pretty darn close though, closer than I expected, so I can't complain too much. 

Wednesday, June 2, 2021

Hummingbird Cake - Taste the Fruity Fusion

 Who loves Hummingbird Cake? 

I remember that this particular cake made a lot of appearances in many different places when I was growing up. I remember that it would show up at the county fair when we worked at the "Chuckwagon Cafe," (operated at that time by Jody Mazac). People would bring cakes in and we'd slice them up and put them in the cake safe to sell during the day. So I would have a piece now and again. Cake sampling! Perks of that job were great! Giant vats of "old timey" bbq sauce made by Eddie Lux's parents (the kind almost everyone used to make that's so hard to find now, unless you make it); Sausage (they usually boiled it, but the brisket was totally legit...and delicious!); steam table with side orders; loaves and loves of bread to soak up that great sauce; BBQ sandwiches...it was a great place to be during the fair, even with all of the clean up when the day was done. We worked really long hours, 6am through 8 or 9pm, but it was temporary, so it was easy to recover once the fair was over. 

This cake was also a frequent visitor at potlucks. My grandma used to make it now and then too. I've even made it at least a couple of times. So...great cake! But...sugar overload!! Even back in the day when calories weren't an issue, it was still too sweet. 

So this time, I made a tweaked version, and baked it in a 9x13 pan because it needed to travel out of town. You can totally get away with omitting some sugar in a cake. It is great for crumb structure, but there's no need to go overboard. I also omitted a great deal of the oil that's called for in the recipe. Guess what? It was still wonderfully moist. I'm posting the recipe now before I forget. And please do make note of the frosting recipe. I tweaked that too, and it was totally bomb! 

Hummingbird Cake


Ingredients

3 cups AP flour

3/4 cup granulated sugar (I prefer Zulka, it's minimally processed & no bone char is used)

1/2 cup light brown sugar

1 tsp. Kosher salt

1 tsp. baking soda

1 tsp. cinnamon

1 pinch of nutmeg

3 large eggs (at room temperature), beaten

3/4 cup light olive oil (coconut or vegetable oil will also work)

1 tsp. vanilla extract

1 tsp. rum (optional)

1 8 oz. can of crushed pineapple with juice

2 cups chopped ripe bananas 

1 cup chopped pecans or walnuts, toasted (but toasting is optional)

Method

(You can use a mixer, but it's not necessary. I used a Danish whisk, but a regular whisk would work fine too.)

Set oven to 350° & coat 9x13 pan with cooking spray. 

1. Sift flour into mixing bowl. Add sugars, salt, baking soda, cinnamon, and nutmeg. Mix well. 

2. Add the oil to your beaten eggs & mix until incorporated, then add to flour mixer & mix until just combined. (Don't worry if it seems thick, the pineapple & its juice will take care of that.)

3. Add crushed pineapple & juice; vanilla; and rum. Mix until incorporated. 

4. Fold in bananas & nuts. 

5. Pour into prepared 9x13 pan. 

6. Bake at 350° for 25 to 30 minutes. If you bake a lot, you know your oven, so adjust as necessary. Test middle with toothpick or thin knife after about 25 minutes. If it comes out clean, take out the cake. Also check to see if cake has pulled away from the sides. That's another good "tell." 

7. Let cool completely before frosting. 

8. Garnish  with additional toasted nuts, if desired. 

You can also use this recipe for 3 9" layers or even cupcakes, if you prefer. 25 to 30 minutes for the layers, 15-18 minutes for cupcakes. 


Totally Bomb Frosting Recipe! πŸ’£

Ingredients:

12 oz. white chocolate chips (I actually used Ghirardelli baking chips in this recipe. The bag is 11 oz. and they do not contain any cocoa butter, but they will still work. If you can find chips with actual cocoa butter in them in your area, well...even better.)

4 oz. heavy cream

1 tsp. vanilla

1 tsp. rum

2 Tbsps. unsalted butter, cubed

1 8 oz. package of cream cheese, room temperature (the brick kind, not the whipped version)

Method:

1. Make ganache. (You can use a bain marie if you like. I made this one using a 1200w microwave.)

2. Pour cream into microwave-safe bowl. Heat for 30-45 seconds. 

3. Add chips to bowl & stir a bit, then set aside for a few minutes. After the wait, continue mixing. Microwave another 10 seconds if necessary to make sure chips are melting. If it seems grainy, add more cream in small increments until it is smooth (you might need to hit it once of twice more with the microwave). 

4. Once the chips are completely melted and starting to look glossy, add in the butter a couple of cubes at a time & stir until well incorporated. It's okay to place in microwave for 10 seconds if needed. 

5. Add vanilla & rum & stir until well combined. 

6. Place a piece of plastic wrap on the surface of the ganache & put it in the refrigerator until completely cooled. It's fine if it hardened. I actually did mine the night before I made the frosting, but overnight refrigeration isn't necessary.  

7. Take the ganache out of the fridge & let rest on countertop for 30 minutes to an hour. 

8. Using a spoon, stir the ganache & scrape the sides to make it easier for the mixer. If you have a stand mixer, just scrape it into the stand mixer's bowl. 

9. Whip the ganache until light & fluffy. Add cream cheese in 3 portions, whipping well after each.

10. Try not to eat it all before you get it on the cake. πŸ˜†


Just One More Thing...

*Some like to use a 50/50 ratio for ganache when making whipped ganache. That's fine if you're planning to use it to pour ganache on a dessert, or to use for dipping other yummy things like cream puffs, but stick to 1:3 for this ganache. (1 part cream, 3 parts chocolate.) This way you won't have to add anything else in to thicken the ganache, like powdered sugar. This version was smooth, creamy, and divine! I didn't try to use it for piping since I was making a 9x13, so I can't speak to that. I will do a test on that in the future.  


Shout-Out to Zulka! Keep Rockin' It!